16" Mini Maxx

Newtonian Telescope

f/4.66 Mirror - First Light 1/7/2019

16" Mini Maxx Dobsonian Telescope

This is the Mini Maxx two days before first light. I set it up at the Mirror lab where it was rated as acceptable. For this group that is high praise indeed!


18" and the 16" mirrors

This is the difference between the 18" and 16" mirrors. The 18" is 1.75" thick and weigh about 40 pounds and the 16" is about an inch thick. This is also my first attempt at making a plate glass mirror instead of Pyrex. The chips in the edge were from 60 years of moving around. This piece of glass was a tool to grinding a 3+" thick mirror in the 1950s and it was covered with caked on ancient red rouge. It looked pretty bad and was almost trashed. Since it was a tool that also meant that I started it as a convex blank, not concave. Fortunately Mike Davis, a friend and fellow mirror grinder, has a vibrating table machine that flattens out the glass. After I cleaned off the rouge Mike's magic removed about 80% of the curve. This is where my hand grinding and polishing started.

16" carefully tray

Early on in the 'hogging out' phase we had a club cookout and the 16" future telescope mirror became a temporary condiment tray. If you look closely you can see where the grinding process is about 3/4" from the edge. At this point, short of breaking it, it's difficult to do much damage to the surface. I was using a 3 pound iron bar bell weight as the tool with 60 grit. Once I was closer to the edge I switched to a tile tool that was already used for another 16" with a similar focal length. The tiles were not thick enough to hog out a flat mirror but they would match up nicely with a little 80 grit once the rough curve was in the glass.

16" starting 80 grit grinding

This is at the end of 60 grit ready to start 80 grit. The edge needs a little work yet and the 80 grit will handle that nicely. This is a remnant of the convex shape that the glass started with The current depth is 203 thousandths of an inch with a target of 207. Our sagitta meter reads three one thousands shallow so after adding three it ends up at 210.

In the end I needed to go a bit deeper to get all of the edge in the sphere and ended up with f/4.66. That's a 1.5" shorter focal length than the original target which I'll call 'close enough!'

16" fine grinding

The mirror is in fine grinding here using 25 micron grit. Later, after 12 micron, I made the mistake of attempting 5 micron and the tool came into contact with the mirror and scratched it. Back to 12 micron. A few of the tiny scratches remained and I'm hoping to polish them out with the cerium. After all, this is plate glass.

16" polishing

This is the beginning of polishing. The edge needs a little better contact. I poured a second layer of pitch over this one when I transitioned from polishing to figuring. That second pour had some turpentine added to soften the 64 pitch.

16" finished

16" final test

The mirror was finished after 10 Saturdays of polishing and figuring. The last day, when the above photo was taken, was after an eight hour marathon figuring session. In the end all axes checked were better than 1/6th wave. All polishing and figuring was with a full size tool and the final figuring was accomplished using a swirl stroke, mirror on top, with the edge of the tool working the high zones of the mirror based on the previous Foucault test. The final test results are shown above with a 1/8.17th wave and 0.986 Strehl. The shape of the plotted line is relative to a perfect parabola for this mirror, which would be a straight horizontal line on zero. The mirror's surface is very well polished and easily passes the laser test that checks for first surface light scatter. We had four mirrors completed at the optical lab in the past three weeks (10", 12", 12.5" and 16") so we are about ready for a trip to Spectrum Coatings.

The reflection on the mirror is from the camera's flash bouncing off of the aluminum coating on the Foucault test tunnel just to the right out of the photo.

The mirror returned with a beautiful coating and is waiting for the rest of the telescope to be built...

16" Rocker Box with Biscuits

This is the base of the rocker box. Sixteen biscuits and Titebond III waterproof glue was used to attach it to the vertical supports. The edges of the bottoms of the vertical support boards had matching cuts to fit the tops of the biscuits. The Titebond glue was used to glue all of the wood-to-wood joints on this telescope. Remember to wipe off any excess glue that runs out of the joint with a damp paper towel.

16" Rocker Box Trial Fitting

This shows the assembled rocker box and the ground board ready for urethane. I use spar urethane that is thinned using mineral spirits. The first coat is about a 60% Urethane and 40% mineral spirits slathered on with a foam brush. Let it soak in everywhere. After that dries and is lightly sanded I use urethane with 5-10% mineral spirits added and then sanding with 220 between coats. The last coat is using spray spar urethane, usually satin. Any small gaps in the finger joints was filled with clear epoxy and applied with a toothpick. The epoxy matches the urethaned wood. Epoxying the gaps before applying the urethane will cause the wood to stay light colored and not the darker urethaned wood tone.
There is a small intentional gap in bottom the corners of the rocker box to allow water (dew and rain) to drain. This is why the corners hang over the bottom circle board.


16" Rocker Box with Biscuits

This is the mirror cell getting its first test fit in the mirror box. The cell was made by JP Astrocraft and he did an amazing job. Later the inside of the box was painted flat black. Since I used 1/2" Baltic Birch I cut off the tips of the 12 screws that hold the mirror cell to the box to that they wouldn't go through the plywood.

16" Rocker Box Trial Fitting

The secondary cage is now complete using a Protostar secondary holder and a Moonlite dual speed focuser. The truss pole sockets are also from Moonlite. I haven't attached the dew heater connection yet to the secondary holder in this photo. They are connected and tested with my home made dew heater controller

First Light

The First Light plaque on the Mini Maxx.


Mini Maxx in the wild

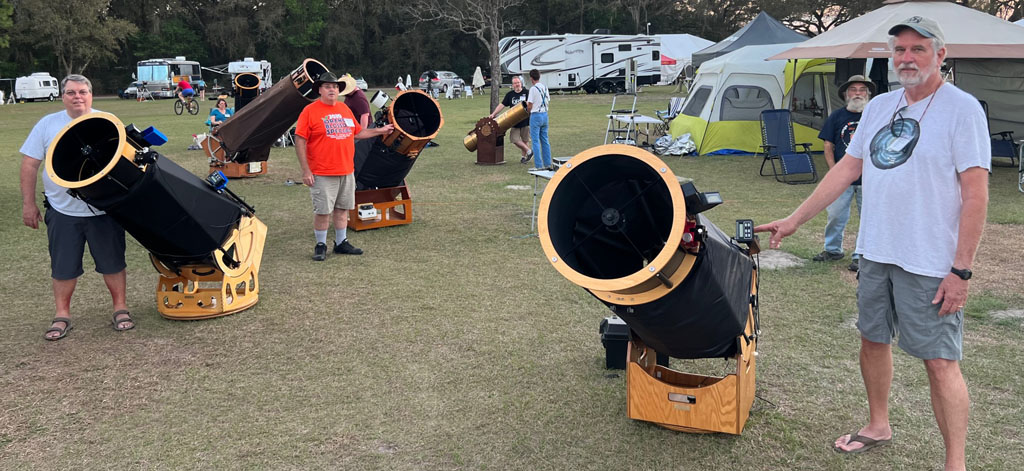
This is the 16" Mini Maxx in the wild for the first time at the 2019 Star Party. The skies only allowed a few hours of observing time but the views were really good and the scope worked perfectly. Behind the Sky Commander (small black box in the middle of the scope) is a serial to Bluetooth adapter that allows the The Sky on a PC follow the telescope. Mike's 17.5" dob is in the background. I have since switched from a full-sized battery to power it to a 12v 7Ah DeWalt drill battery attached to a 12v lighter socket that is Velcroed to the rocker box base and powers the dew heaters and sky commander all night.

Mini Maxx at the 2020 Star Party

This is the 16" Mini Maxx (back center) at the 2020 Star Party. We actually had a really good, clear night on the last night of the gathering and hunted down dozens of faint galaxies and planetary nebula.

Mini Maxx at the 2022 Star Party

At the 2022 Star Party we had five nights of clear skies and dug deep into the IC and ARP lists.

email

Go Back To The Main Page