Grinding the 18" Maxx Pyrex mirror with my assistant.
Grinding the 18" Maxx Pyrex mirror with my assistant.
I was a mirror maker and instructor at the St. Petersburg Astronomy Club's Mirror Lab for over 17 years. During that time I made four mirrors for myself (8", 12.5", 16" and 18"), a few for raffle scopes and helped, along with a few other instructors, 100+ ATMers make their own mirrors and telescopes. I added a few more links than usual to help you locate some of the tools and supplies. These are some of my thoughts on the process.

Telescope mirrors of the type used in most Newtonian reflectors may be bought, salvaged from old telescopes or ground and polished by the telescope maker. In extreme cases of do-it-yourself you may have access to a kiln and melt your own glass. I'm not doing a deep dive into mirror making here but I'll give a 10,000 foot view of the key steps. Contact your local astronomy club to see if they have some experience and the test equipment to help you along on this journey.
Entire books have been written on making telescope mirrors. The mirror making bible is How to Make a Telescope by Jean Texereau. The overview presented here skips many of the nuances needed to make a really good mirror. Ron, one of the Mirror Lab instructors who specializes in mirror figuring, is able to quote the Texereau's book like some can quote the bible.
You'll need some way to measure your progress. It's much easier to use tested measuring tools from your local club, if they exist, than create your own. Maybe consider forming a mirror making group in your area if one doesn't exist. This is a summary of the tools that we used. For the initial curve either a Sagitta Meter or Spherometer. I do not recommend using a hard curved template although it's better than nothing. The simplest way to check the general curve is to use the sun and see where the focus point is. Be careful not to check the focus point on anything flammable. There is also the option to use a straight bar across the mirror and spark plug feeler gauge to determine the gap and sagitta of the mirror.
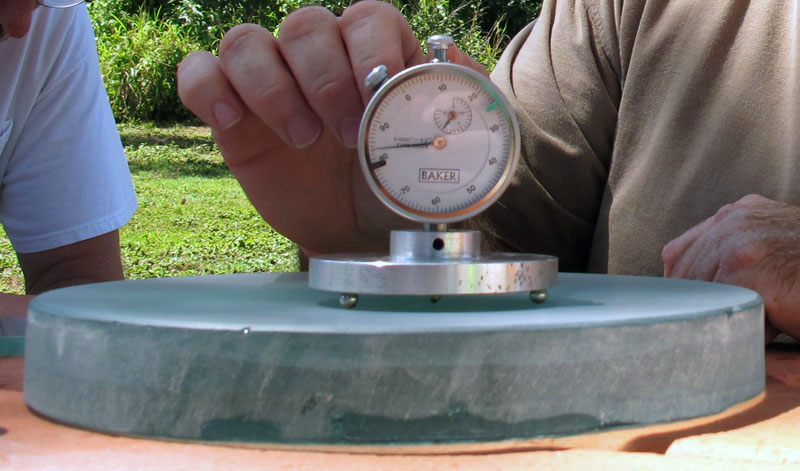
Spherometer testing the curve and depth of a mirror. The Spherometer requires some calculation to use or Kenneth Hunter's spreadsheet. It can test the depth as well as the consistency of the curve.
Sagitta meter testing the depth of a barely started mirror. The Sagitta meter requires a value from this table that shows the depth for the desired mirror focal length and mirror diameter.

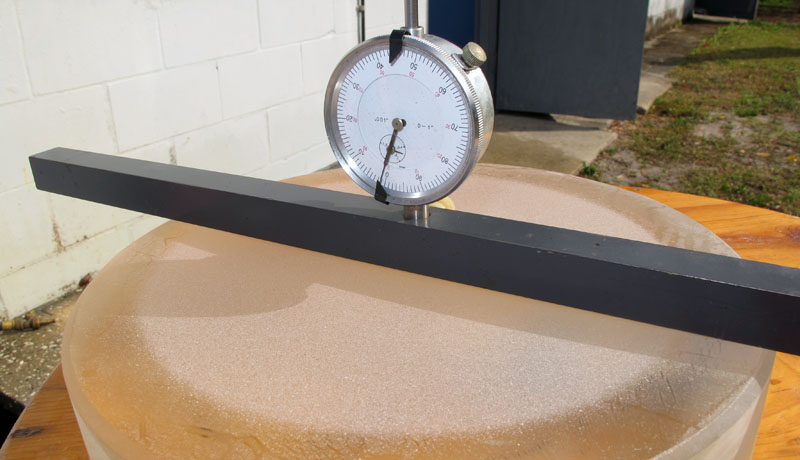
A bar sagitta meter is pretty easy to make. It's important that the hole in the bar for the meter is perpendicular to the bar. An additional flat piece of material is also needed to calibrate the gauge to zero relative to the bottom of the bar.
Using the sun your uncoated mirror is able to determine its focal length. First the warning: This method can easily start a fire. Only aim the mirror's reflection at non-flammable objects, like a cinder block, and have a fire extinguisher near by. You may need to wet the mirror's surface first. Aim the Sun's reflection at the non-flammable surface and have someone with a tape measure ready. The goal is to have the sun make a compact circle on the target. If you are too far away the circle will become a horizontal oval, if you are too close it will become a vertical oval. When you are at the correct distance it is a circle. Measure the distance from the mirror's face to the target with the circle and you have the focal length. Using a Foucault tester is a little more accurate, but this will work.
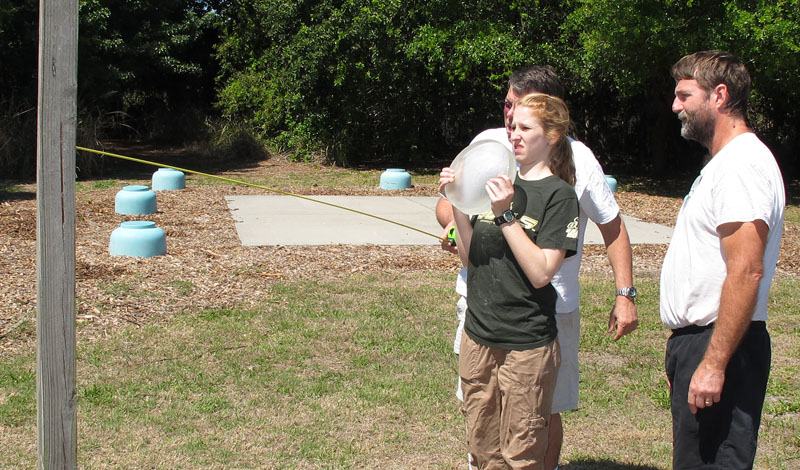
Getting the mirror's focal length using the Sun and a tape measure.
The robo Foucault tester is the workhorse of the mirror lab and every mirror had multiple tests. To test the mirror's surface during polishing and figuring a Ronchi test, Foucault test or an Interferometer could be used. We generally used the robo Foucault tester. This is the updated Robo Foucault that uses an Arduino and USB to connect to the PC when it was being tested against values from the original Robo Foucault. The numbers matched.
Manual Foucault test are also an option using a knife edge stand and a hand cut zone mask.
The Foucault test should be in an area without air currents or enclosed in a tunnel to block them. The distance from the knife on the Foucault tester to the face of the mirror is the radius of curvature (ROC), which is twice the focal length. A mirror stand that may be tilted up and down a bit will also be needed.
The Foucault test zone readings (robo or manual) are usually fed into the FigureXP or similar program to display the results in an easy to understand display.
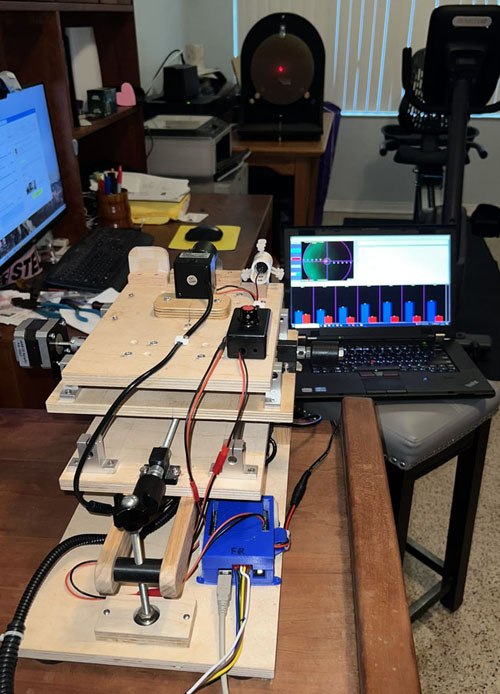
Robo Foucault USB during testing.
The Interferometer has the ability to test the entire mirror's surface. The resulting image may be additionally processed by OpenFringe or similar software for more information. The Interferometer was too sensitive for the Mirror Lab. It picked up the pump vibrations from the water treatment station next door as well as anyone moving around the lab.
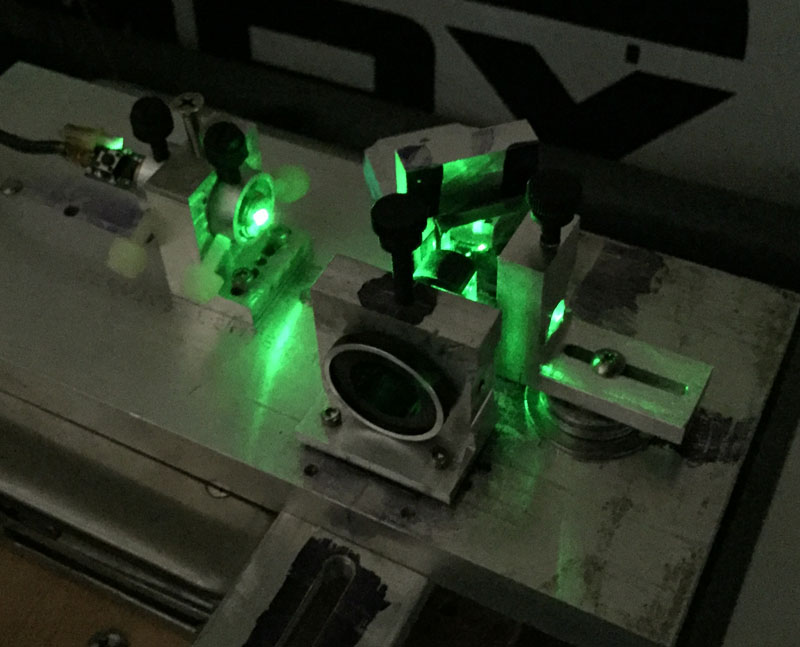
A Bath Interferometer
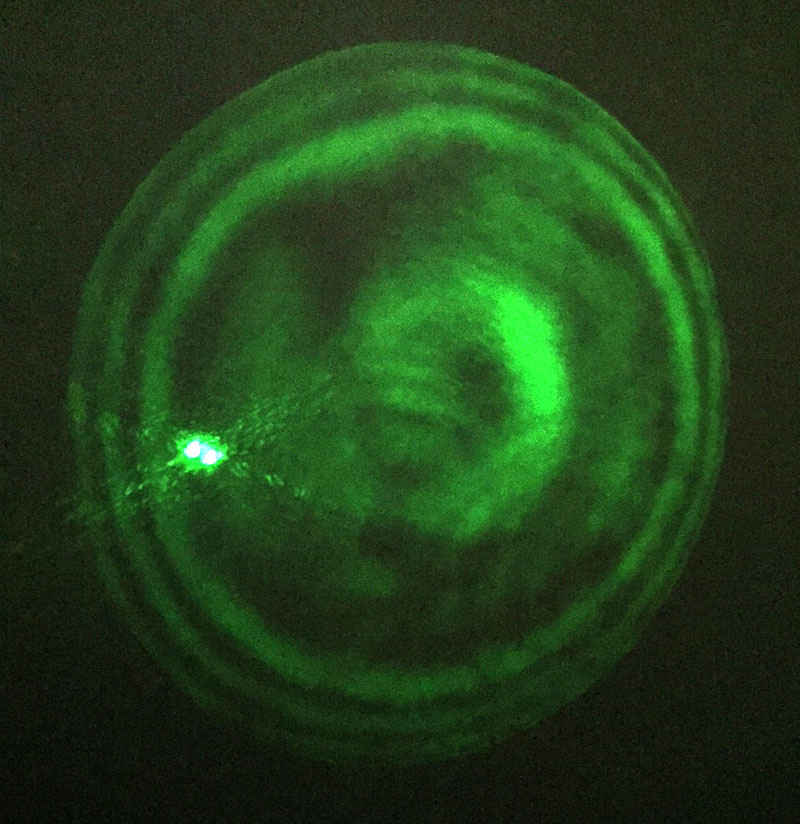
Fringes from the Bath Interferometer
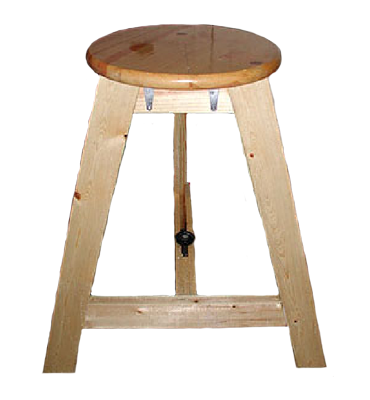
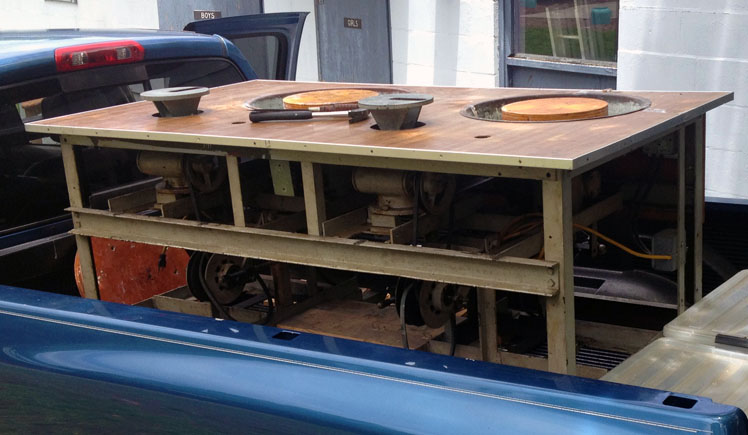
I came up with a folding grinding table for the Mirror Lab. I made three of these for up to 14" mirrors and one that was oversized (in the top photo of this page) for up to 20" mirrors. They were in use for over 16 years. Click on the link for the PDF plans. Grinding tables are often referred to as the 'barrel' due to barrels of various types frequently being used as the grinding stand.
You will need two tools. For many years dental stone was used to make the tool base. That has become more difficult and expensive so an alternative was found. We now use Hydrostone. This is a waterproof plaster-like material often used making backyard fish ponds that is strong and easily formed into the needed sizes. Tools may be stripped and reused many times. It is important to read the instructions on the bag and you must use a filtering face mask when mixing the powder with water to prevent breathing in the Hydrostone dust.
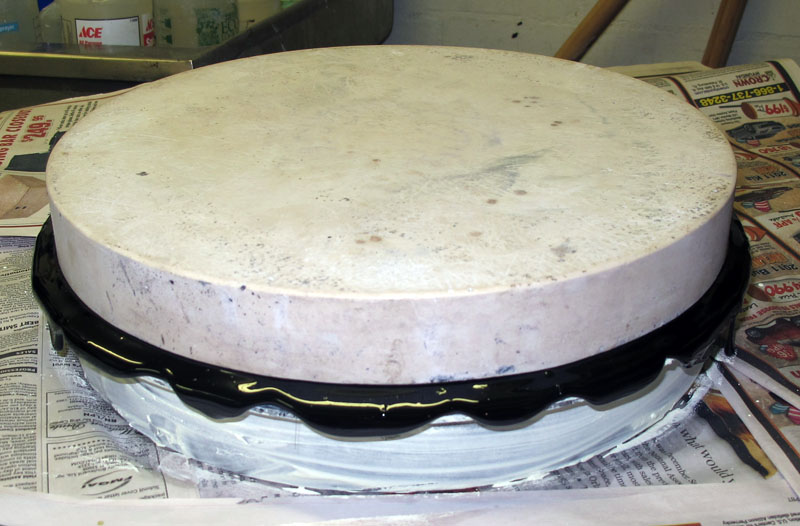
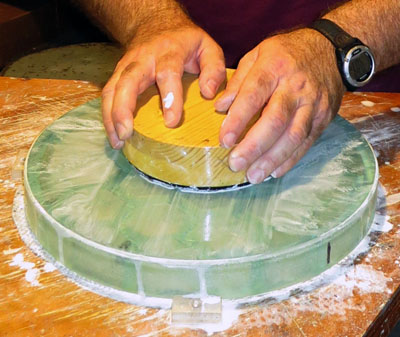
We circle the mirror with a thin band of reusable UHMW plastic and band or tape it in place around the mirror's circumference rising above the mirror at least as high as the thickness of the tool. In most cases a 1" thick tool is adequate for the process. You may place some wax paper on top of the mirror for protection although we have found that isn't necessary before the polishing begins. Mix up the Hydrostone into a thick paste and pour it into the form and use a stick or spoon to tap the Hydrostone mud to vibrate out most of the the bubbles. The Hydrostone will become warm as it hardens. Usually you may separate the tool from the mirror in an hour or two. Place the cooling tool on something to allow air flow underneath it. After that you likely will need to let it cool and dry off overnight.
Chip off any pointy spots, bevel the edges and smooth the back of the tool, if needed. Rubbing the back side on smooth concrete works. Your tool may now be used for tile for grinding or pitch for polishing. When using tile we like 20 minute epoxy to hold the 1" hex tiles in place. The pitch will stick by itself when hot. When your mirror is finished the tile may be heated with a torch and it will peel from the tool and the pitch may be carefully chiseled off and remelted with some Mineral Spirits and fresh pitch and reused.
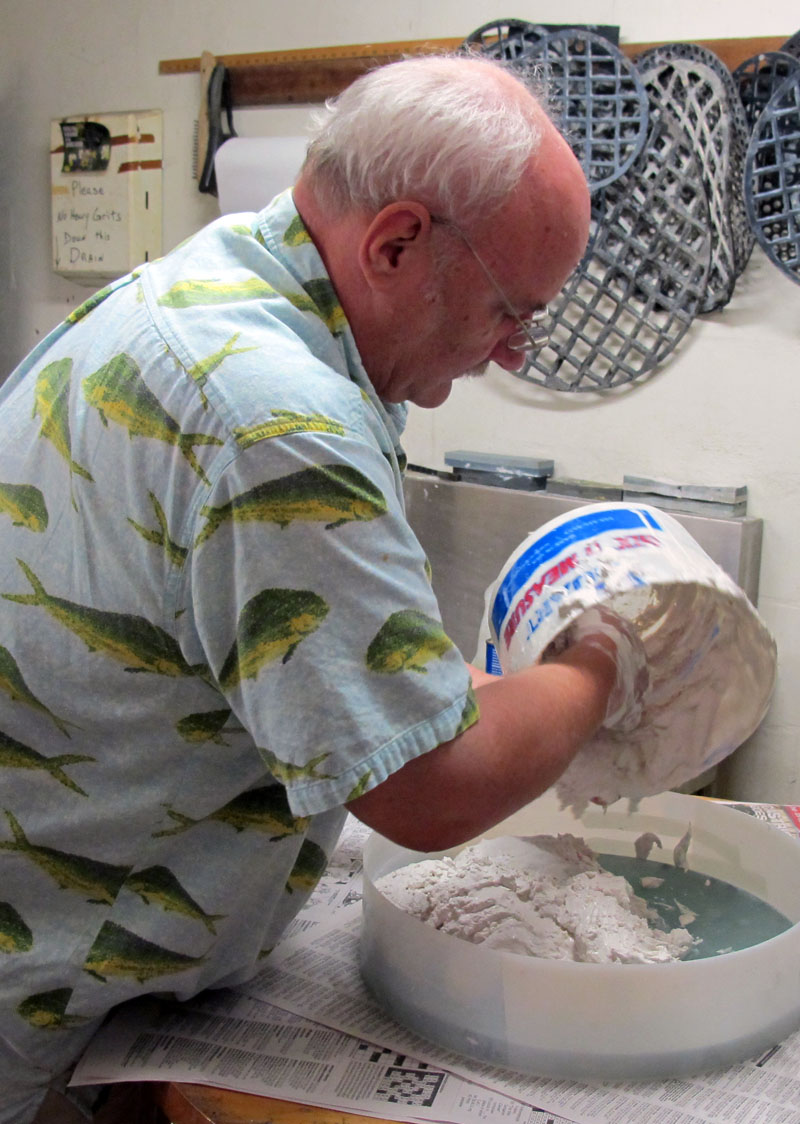
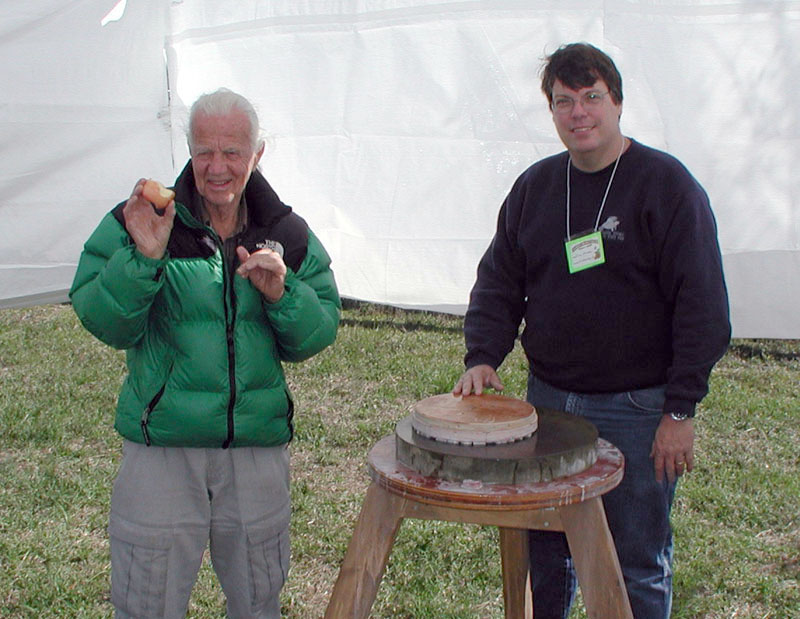
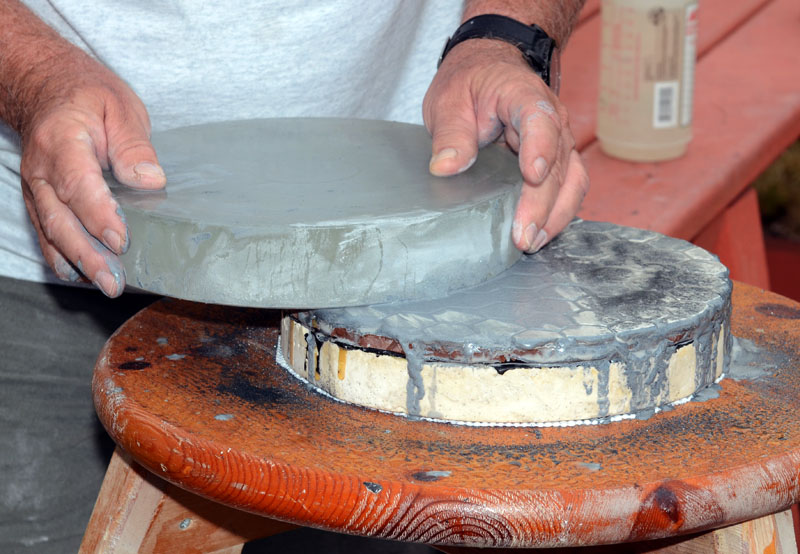
Pouring the thick Hydrostone. Paul had a mask on until the Hydrostone powder was completely mixed with water.
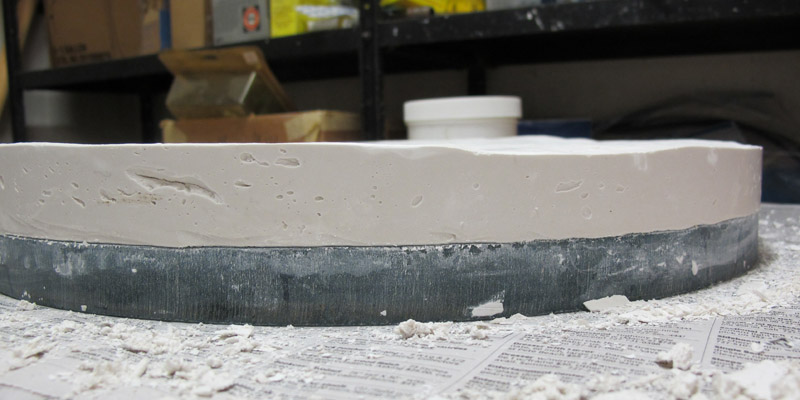
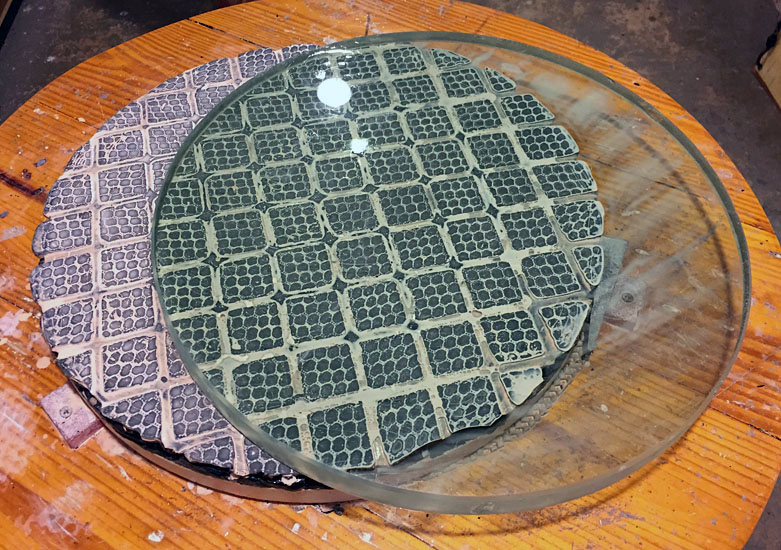
The outer form removed the Hydrostone and mirror cool. When separated the tool's convex curve will match the mirror's concave surface. Usually a flat tool is created for the tile tool and when the curve is close the tool for the pitch is created. The curved tool helps keep the edge of the pitch from becoming too thin.
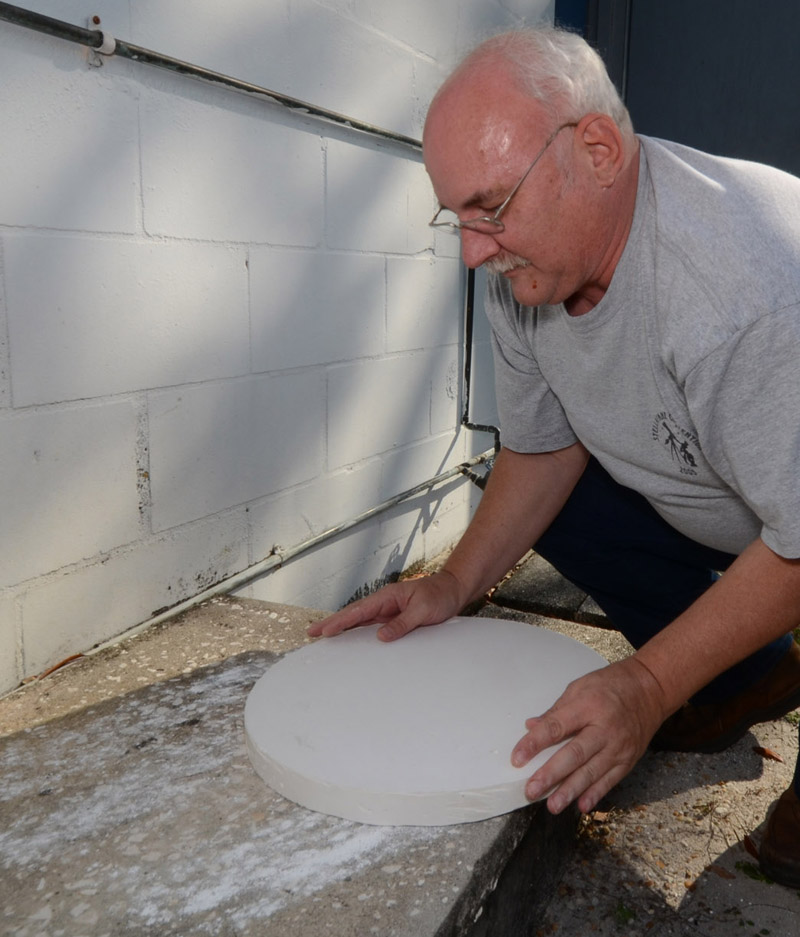
Flattening the tool's back.
First you will need to acquire a mirror blank or an existing mirror that you wish to refigure. This should be glass that does not have bubbles near the surface and does not have stress (properly aneled). The latter may be checked using a LCD monitor with a white screen and the mirror blank in front of it. Then rotate a polarized lens (polarized sunglasses work) in front of the blank to see if any stress shows up. This is seen as dark lines or curves in the glass and an 'X' in the photo.
I prefer low expansion glass in the borosilicate lineage. Quartz and Zerodur are even better, although more costly and harder (slower) to grind and polish. The low expansion glass usually takes longer to cool off but changes their shape less. This allows you to use it soon after setup. Plate glass mirrors cool off faster but change their shape more while cooling off. In the end they both work and you are unlikely to notice any difference. I recommend staying away from Black Vitrified Ceramic (BVC) layered glass, although with care a good mirror may be made using it.
If you really want to DIY your mirror check out Mike Davis' page on melting glass and casting light weight mirror blanks. Mike lives close enough to me that if we loose power I blame him for turning on his kiln.
The dark lines show that there is stress in the glass. This is a glass tool. You do not want any stress in the mirror glass or that stress will come out during figuring changing the shape of the mirror's surface.
Once you have a suitable blank you will need to bevel the edge of the mirror's face. Take about 1/8" at 45 degrees off all the way around. This prevents the edge from getting too thin and breaking off during the next steps. You may need to re-bevel if the grinding gets too close to the edge. My beveling tool of choice is a diamond knife sharpener. They are lighter than a stone (less impact) and cut into the glass faster.
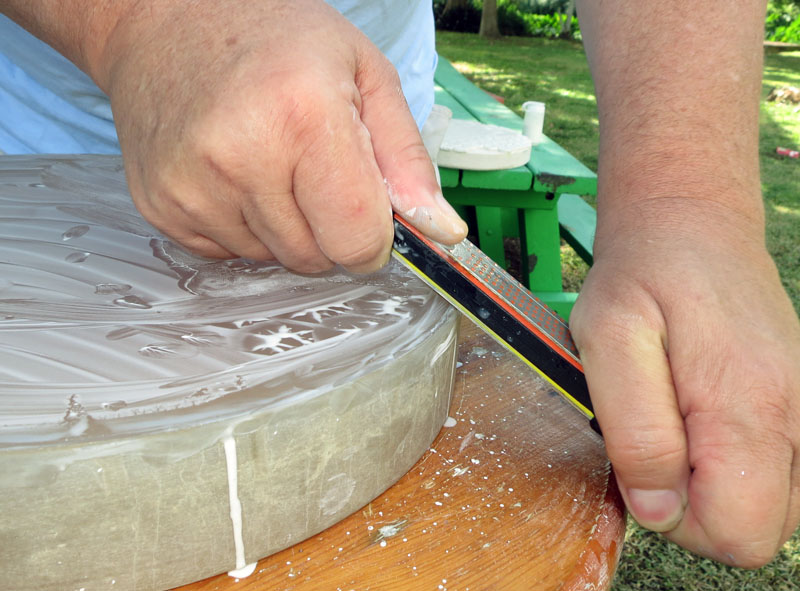
Using a diamond knife sharpener to bevel the edge of the mirror
The bevel on the edge of the mirror
While an electric grinder has been used to successfully generate the rough curve for mirrors, the new mirror maker should make a tile tool and manually create the curve. This involves epoxying small individual tiles, often unglazed 1" hex, to a Hydrostone base. This base is usually made the same diameter as the mirror. A Silicon Carbide grit, usually about 60 grit, is used between the tool and the face of the mirror to grind out the center of the mirror to the desired curve. This is done with the mirror on top of the tool and the mirror should half way hang over the tool. This will work the middle of the glass and the edge of the tool. This tool will match your mirror and should be kept until the mirror is finished. Between strokes walking around the grinding table while slightly turing the glass in the opposite direction should prevent overworking one area of the glass. Keep a spray bottle with water in it handy and only grind with wet grit.
This is a bit more advanced. On my 16" and 18" mirrors I hogged them out using a 3 pound barbell weight. It needs to be round and not an octagon or hex shape. While smaller than the mirror it worked. This cut into the center on the mirror much quicker than a full size tool and I had to switch to a swirl stroke that moved the barbell tool in a circular motion around the parameter of the mirror to blend in the edge to the center. If you do this you need to make a tile tool that matches the curve of the hogged out mirror. finish and smooth out the sphere using the full size tile tool.
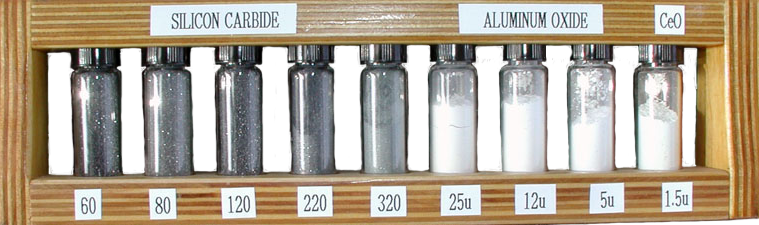
Grinding and Polishing Compounds.
Tool used to hog out and grind a mirror.
Once the curve is close you will start switching to finer and finer grits working out the pits and scratched from the previous hogging out. Between each grit thoroughly clean your tool to prevent larger grits from scratching the mirror's surface. The stroke that you usually use here are center over center strokes. Every 15-30 minutes alternate with the mirror on top (makes a slightly deeper curve) and then the tool on top (makes a slightly shallower curve). This should average out to maintain your mirror's proper curve, which determines the mirror's focal length. A loupe or other magnifying device is helpful to check for deep pits. A plastic base helps prevent scratches on the mirror's surface.
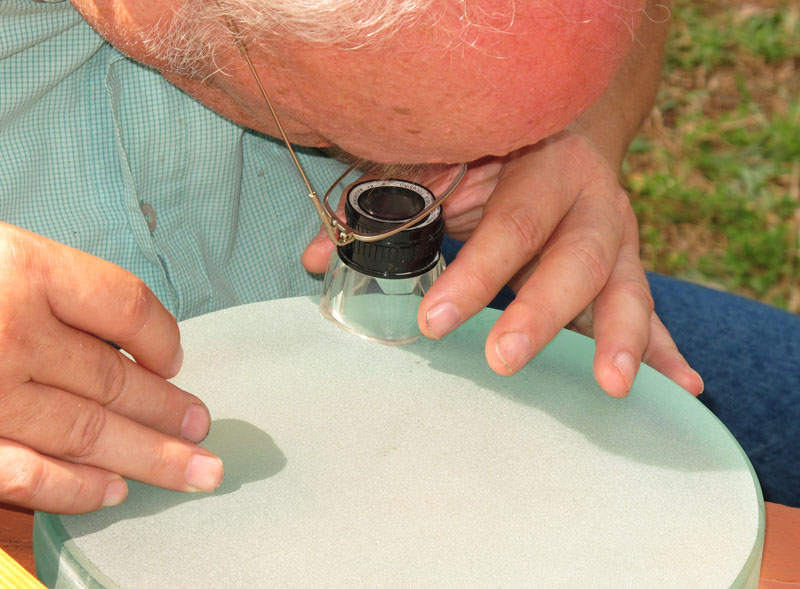
Paul checking for pits between grits.
When you are using the larger grits, like 60 or 80 grit, they make a loud grinding sound when in use. When the sound starts subsiding it's time to add more grit. In the photo here the used grit slurry has flowed off of the tool. We have often tossed that used grit back on the tool to get full use out of it. The Silicon Carbide fractures when used so two passes is about all that you can expect from it. At the SPAC Mirror Lab you could frequently hear Paul yelling 'More Grit!' to the outside grinders when they were not making enough grinding noise.
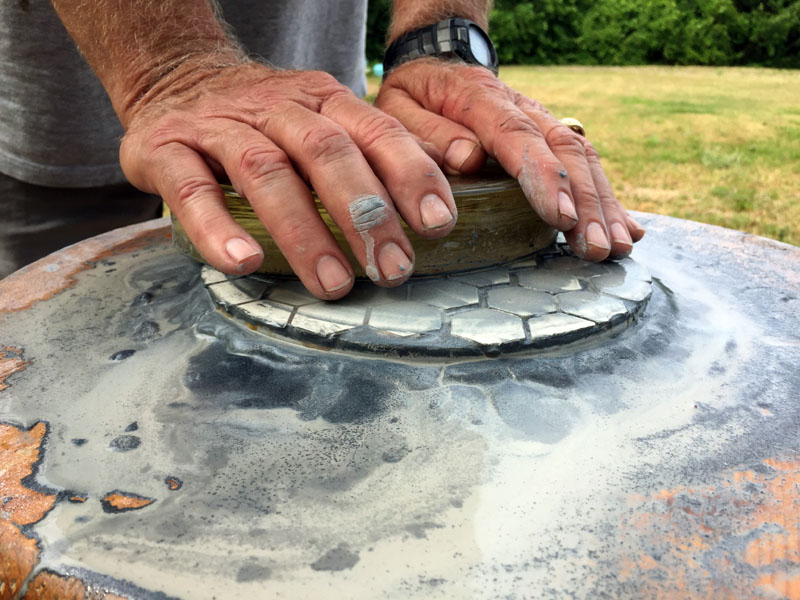
Used grit flows off of a tool while grinding.
You will keep this up until the grit designation changes from particles per inch to a micron size, like 25 micron. This is fine grinding. It's really important to keep the grit wet and prevent any contaminates from getting between the mirror and tool. Using the same center-over-center stroke you'll take this down to about 12 micron. I don't recommend 5 micron due to it becoming likely that the tiles will come in contact with the mirror's surface scratching the glass.
Fine grinding the mirror
You will need to make a pitch lap (high quality pine tar) tool to polish and figure. This tar isn't what you buy at Home Depot, but a high purity birch pine tar made for mirror work. We usually use the Gugolz Pitch 64. The kilo of pitch is broken up and placed in a pot on a hot plate. The tar is slowly melted and stirred until all of the pitch is like a thick syrup. We frequently broke off old, clean pitch from tools and added it to the pitch pot with a couple of cap-fulls of turpentine to soften it up a bit.
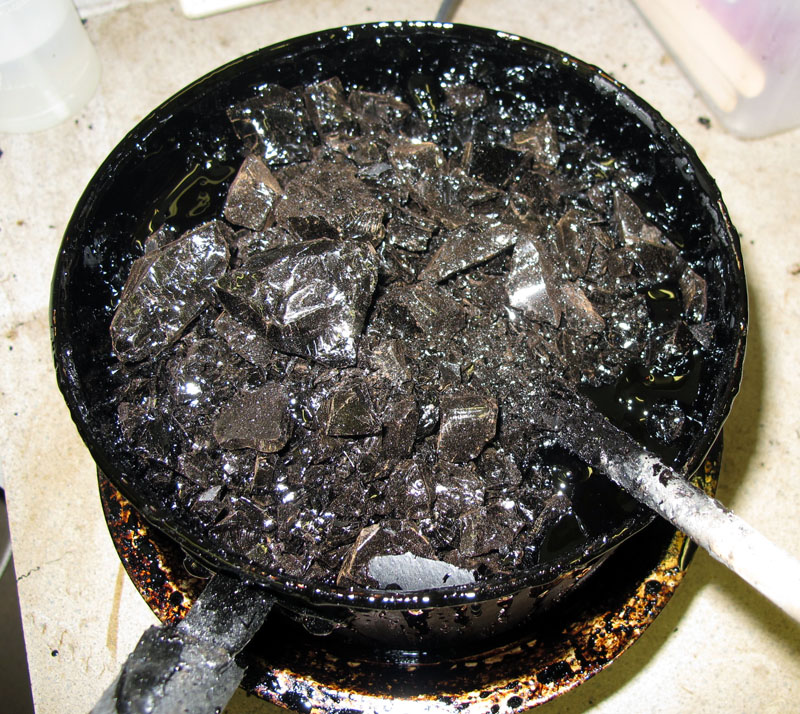
Chunks of cold pitch in the pitch pot.
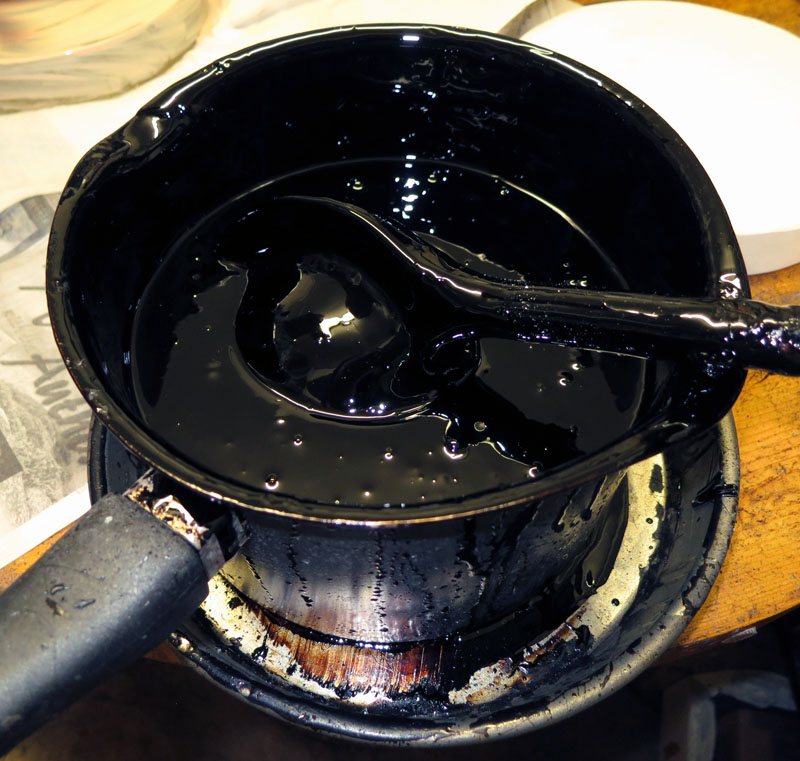
Mostly melted pitch with a ball of hard pitch waiting to be melted.
There's a lot of pitch porting info in this next photo. We used 1/4" thick rubber mats from the local Goodyear store that were hand cut out to allow thick groves in the pitch pour. The reusable mats, many seen hanging on the wall by Ralph's head, covered 6" to 20" mirrors. Ralph is a founding instructor with the lab and an ace pitch pourer. The pitch pot has an extra tray under it to catch any dripping pitch so that it won't get on the hot plate coils.
The mirror is placed face up and covered with cerium oxide slurry on its face and sides. The rubber mat is also covered with cerium oxide slurry and placed on the mirror's face. Give the slurried surface a spray or two of water to make it damp before the pitch pour. The pitch is them poured on the mirror. Then the tool is placed on the hot pitch and given a few minutes to cool. As the pitch starts to firm up attempt to move the tool side to side a little (1/4"+) to free it from the mirror's surface. The rubber mat will move with the tool at this point. Do not remove the tool until the pitch oozing out of the sides is flexible but firm.
The tools in the photo already have old pitch on them. We found that we could successfully re-pitch the tool's surface a few times before recycling it in the pitch pot.
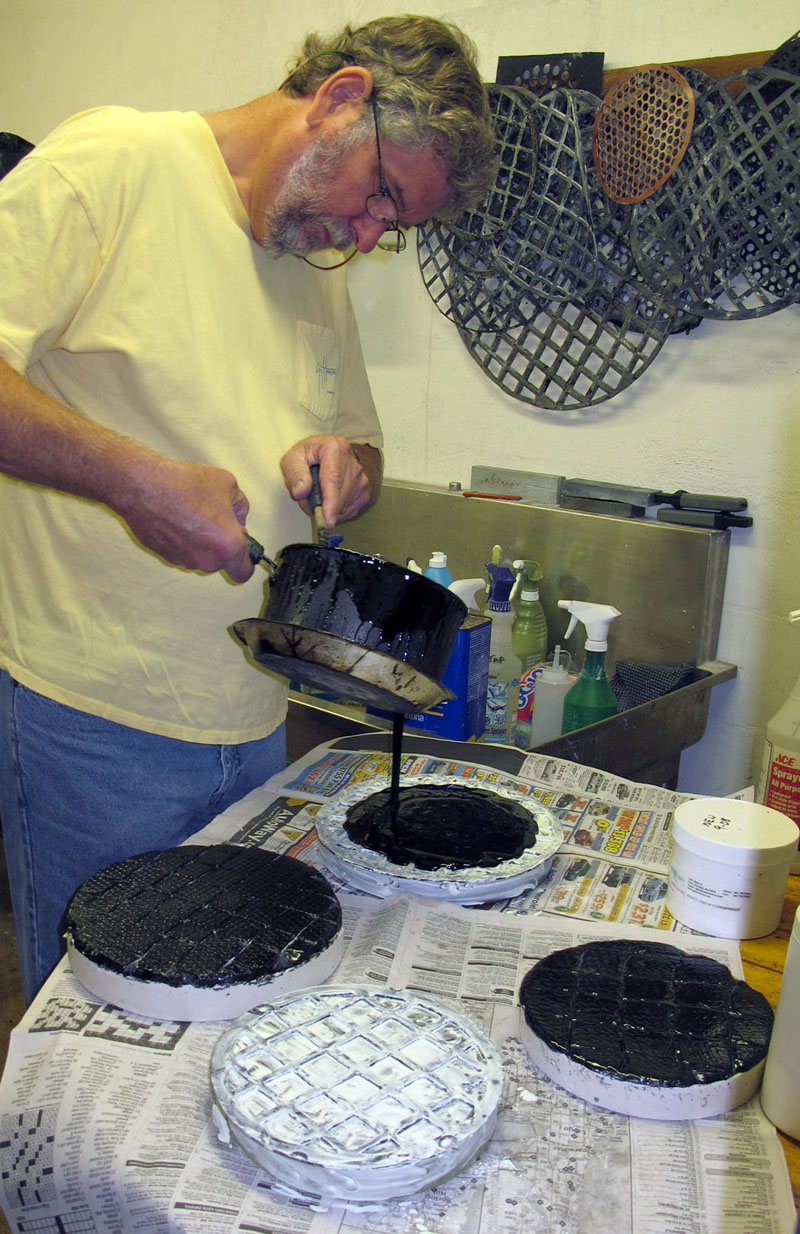
Double pitch pour using rubber forms.
Note that 'cerium oxide' is usually just referred to as 'cerium' around mirror grinders. If you hear of anyone using 'rouge' it used to be used to polish mirrors and is made of very fine particles of rust and usually has a red color. Rouge never comes off of clothes and polishes slower than cerium oxide.
After the pour there will be pitch that squeezed out of the sides between the mirror and tool. The best way that we have found to remove it is with a sharp wood chisel. The pitch breaks off easily and may be immediately tossed back into the pitch pot.
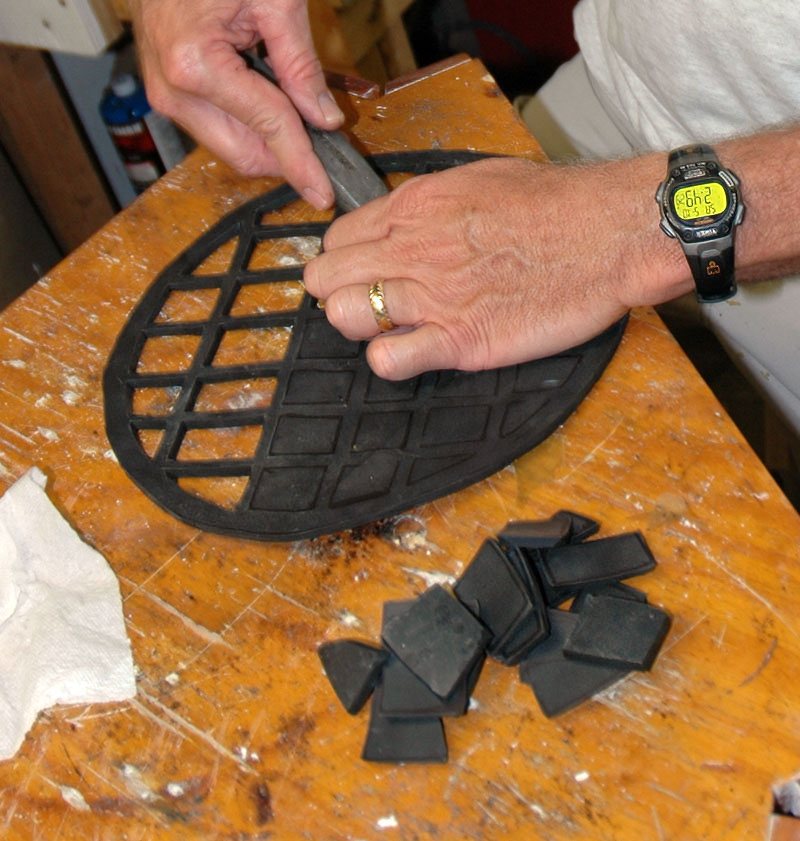
Cutting out a new Pitch mat from 1/4" thick rubber sheet.
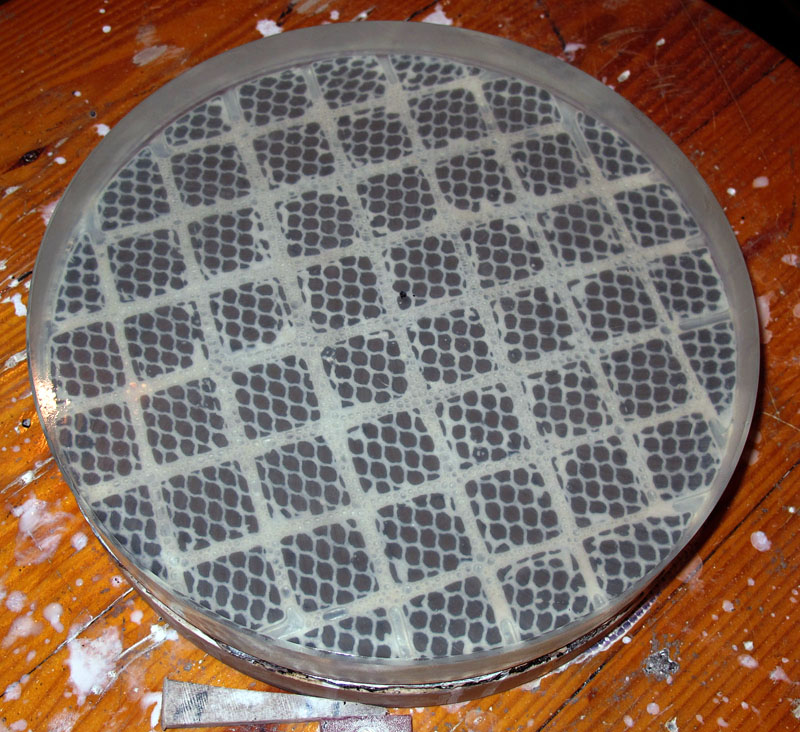
A new pitch lap after pouring and pressing with the mirror's curve.
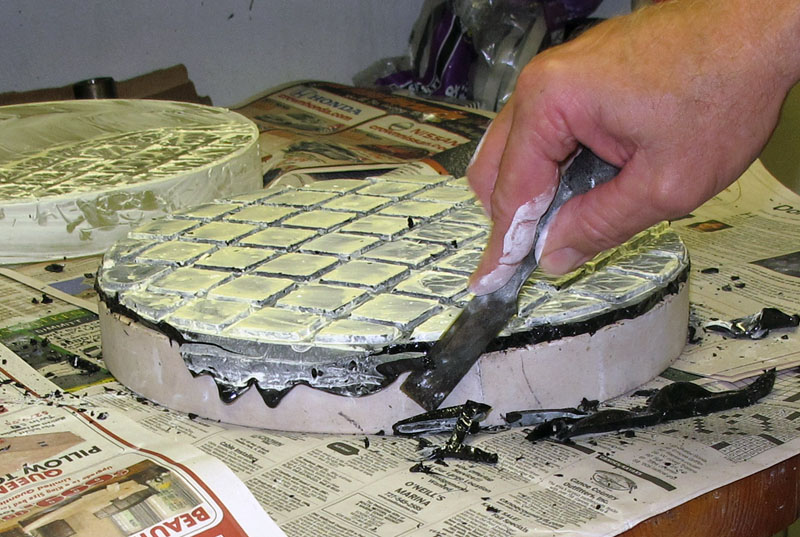
Trimming the excessive pitch from the sides of the tool.
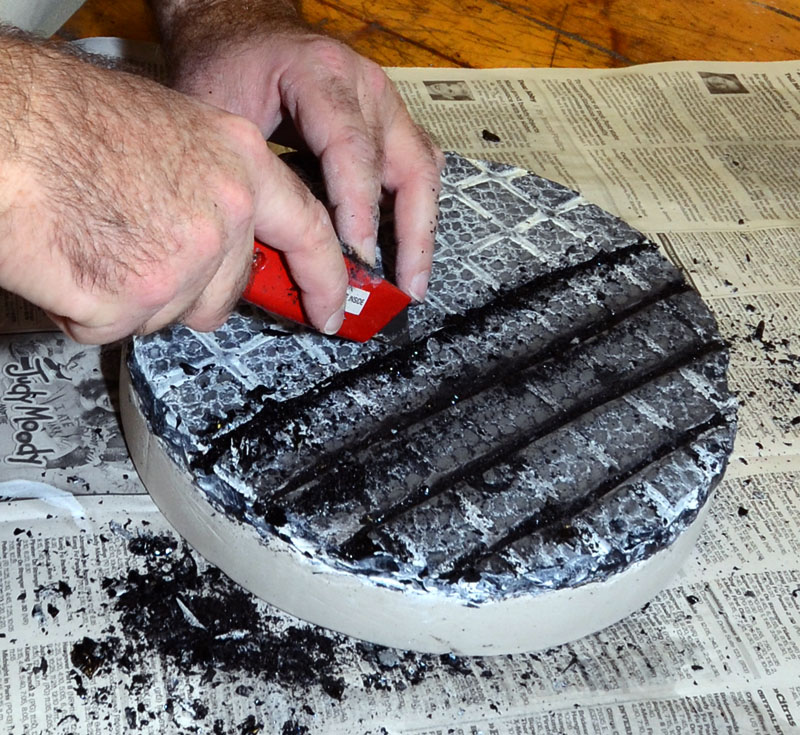
A box cutter making new grooves in a pitch lap.
When not in use I like to store my pitch store the pitch lap in a zip-loc freezer bag that has been inflated so that nothing actually touches the pitch. If anything presses on the pitch it will leave an indent. The pitch will sag under its own weight and attempt to flatten over time. Because of this the pitch will need to be regrooved and pressed against the mirror to reform a matching curve. The grooves are needed before the press so that the pitch has somewhere to move to, or flow, during the press and polishing. If the pitch gets too hard or thin new pitch will need to be poured. At some point the volatiles that make the pitch soft will evaporate out and the pitch will become too hard.
Grooves may be added by re-pouring the lap, but if the pitch is still moving it's much easier to re-groove it manually. If you have a cold lap I recommend using a box cutter to cut 'V' shaped grooves across the pitch to make about 1" rectangles. If the pitch is warm, like after a heat lamp warms it, you may use a straight edge with cerium oxide on it to press in the grooves. These rectangles will spread out a bit as the mirror is pressed and polished filling in some of the grooves. You may need to re-groove and repress during a long polishing session.
We kept a stainless steel wire brush for slightly roughing up the surface of a smooth tool. Brushing removes the embedded cerium on the tool. Sometimes we needed to press pretty hard on the brush to get back to the black pitch. Make sure not to leave any wire strands on the tool when the brushing is finished.
The mesh in the photo was from a WalMart laundry bag that was cut open. We like to use that to make micro grooves. This gives the pitch more area to move and the cerium oxide a place to flow.
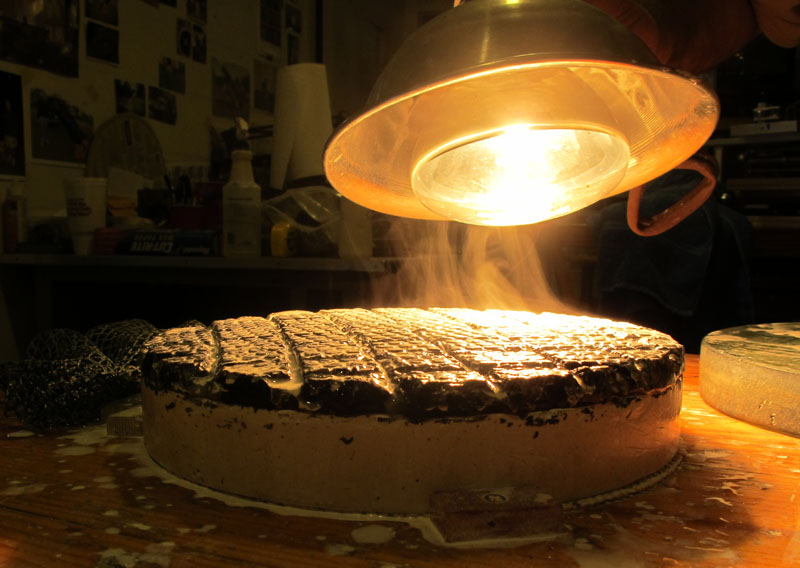
We used a heat lamp to warm up the pitch tool a little before pressing it to the mirror's curve.
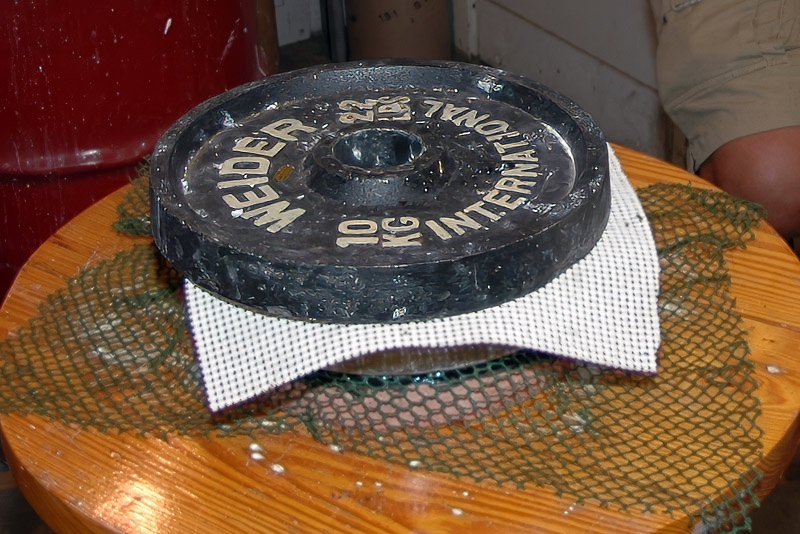
A normal press, starting at the bottom, the cerium oxide coated and wet mirror, a cerium oxide covered mesh, the pitch tool, a little padding, some weight.

A 12.5" mirror with 85 pounds on it during a cold press. This tool really needed better contact.
The grinding steps may be preformed outside. I strongly recommend that all polishing and figuring is done indoors. Fans may blow around particles that are large enough to scratch the glass and should be avoided. Air conditioning and heating work well. Consider using distilled water in your spray bottle and to make the cerium oxide slurry in the polishing/figuring phases to prevent particles in the tap water from scratching your mirror.
There are many polishing strokes but the basic is, with good pitch contact, the classic center over center with mirror on top and tool on top every 15-30 minutes (be constant).
While you must polish all the way to the mirror's edge be careful not to overwork the edge. This could (and will) lower the edge relative to the spherical shape (or parabola is figuring) resulting in a turned down edge (TDE in ATM speak). The only way to fix a TDE is to polish or go back fine grinding with your tile tool to lower the middle and get the mirror back to a sphere. Keep your tile tool until the mirror is finished.
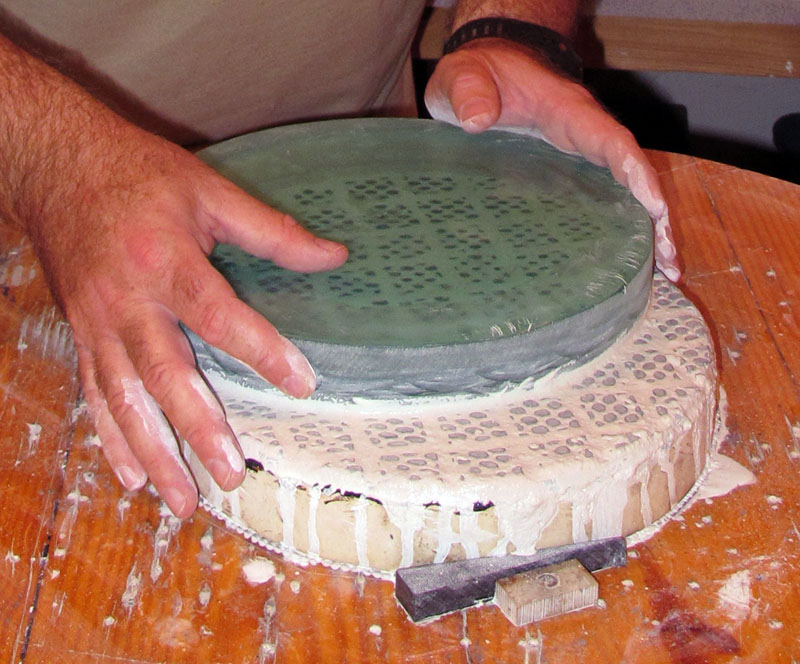
Before polishing or figuring the tool should make contact across the mirror.
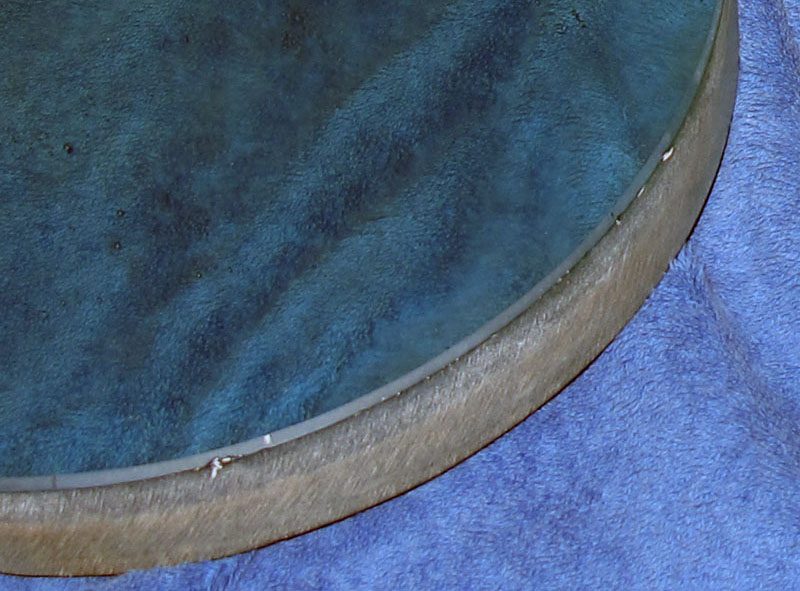
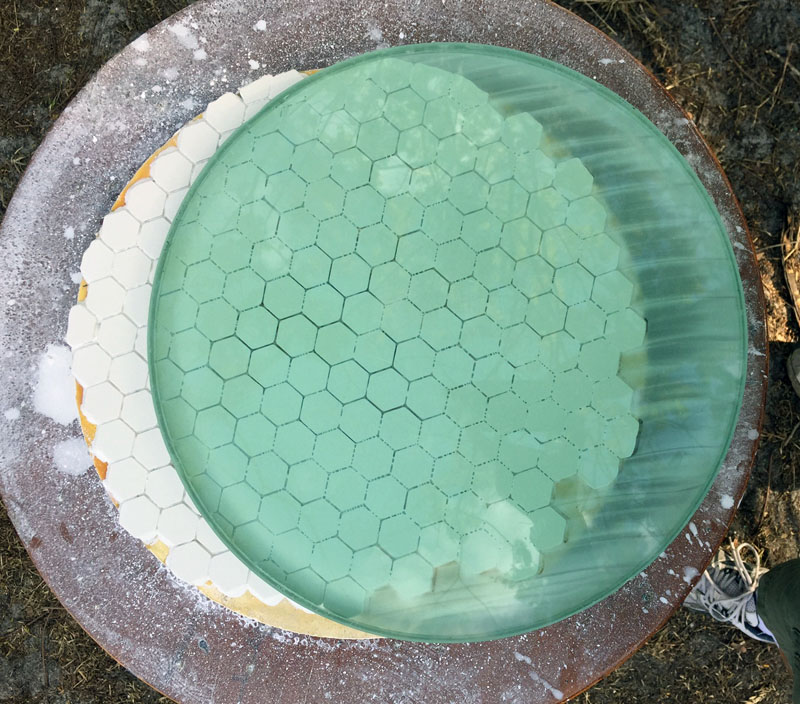
The green hue of this plate glass mirror can be seen as it is being polished. This mirror was made in Mike's kiln.

A 20" BVC mirror being polished with a full size pitch lap tool. A grinding table's turntable was used to slowly rotate the mirror while the polisher moved the mirror back and forth.
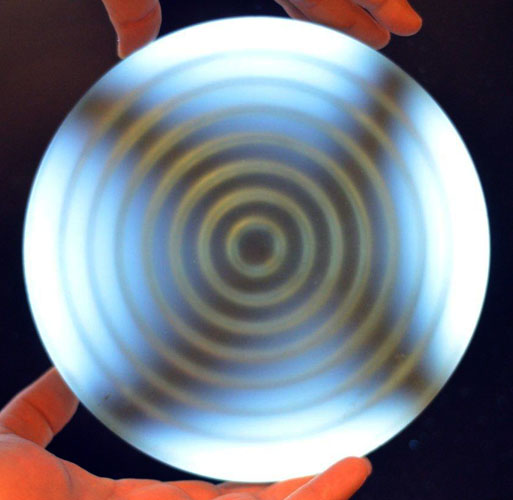
Use a hand-held laser to check the polish. A clean well polished mirror will only return the laser's beam on the primary light axis. If it's scattering on the mirror's surface you either has cerium oxide on the surface or it's not fully polished. Scattering is where you can see the laser hitting the surface from any angle. The mirror may look polished visually after the first hour or two of polishing. The laser will show that it isn't.
Completely polishing the mirror is important because that scatter that you see with the laser is the same think that will happen to star light reflected from the mirror. The scattered light will make the star dimmer and the scattered light will make the background lighter. This reduced contrast makes those those faint fuzzies harder to see. An excellent polish is worth the effort.
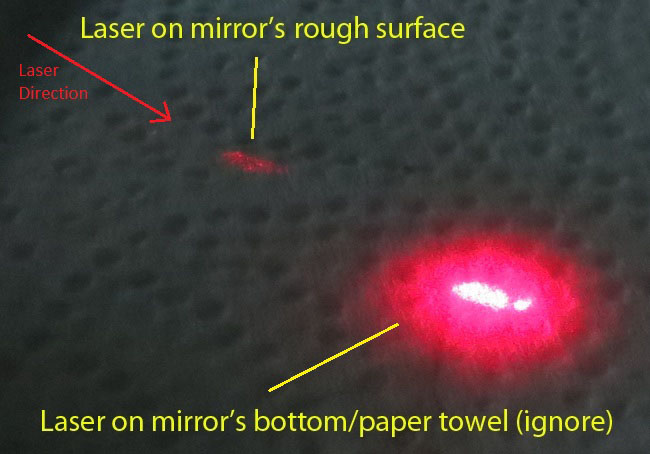
Testing the polish with a hand-held laser.
Ideally your well polished mirror has a spherical curve to it. The goal here is turn the sphere into a parabola that matches the mirror's size and focal length. With a well groved and pressed tool you will make a 'W' stroke as you move the mirror side to side. This is the most delicate part of the process and you are better to stop and test the mirror's figure often rather than overshoot the parabola.
With mirror on top making the 'W' stroke a little shorter side to side and near the middle longer forward and backward will work the edge more. Making the 'W' stroke slightly wider side-to-side without adding to the forward backward will work the center of the mirror more. There are other strokes for advanced polishers such as box and swirl. After using an interferometer we have been successful using very small tools to spot figure a high area on the mirror.
Once the mirror gets close to being properly figured make sure to thoroughly wash it before each test. If you allow the cerium oxide to dry on the mirror you may need to use the polishing tool to remove the dries cerium oxide and that may change the mirror's figure.
Most of our testing at the Mirror Lab was using the Robo Foucault Tester. Towards the end we will rotate the mirror and test three different axis. We attempted to use a interferometer but the water treatment plant next door had pumps that vibrated the ground and affected the test results.
Most of us at the Mirror Lab have been using Spectrum Coatings to aluminize our mirrors. Spectrum does a top-notch job coating the mirrors and has a really professional set up. I've been on a tour of his coating shop and it's impressive. (I receive nothing for recommending Spectrum Coatings)
Using a sub-diameter tool to polish and/or figure is advanced and generally should not be attempted for your first mirror. It allows you to work specific areas or zones but runs a high risk of making your mirror asymmetrical.
Pitch lap figuring the 16" Mini Maxx mirror.

Figuring the Mini Maxx mirror.
The mirror here looked pretty good at first glance. That is until we put it into the foucault tester. This is the display on the screen before actually running a test. There were shallow grooves in the mirror's surface likely made from hard pitch during final polishing or figuring. The smooth image is after using a new pitch lap and about 3 hours of polishing and refiguring. This mirror, by Steven Maiaroto and his Grandson, won 2nd place in the under 12.5" optics award at the 2019 Stellafane convention. Testing is important.
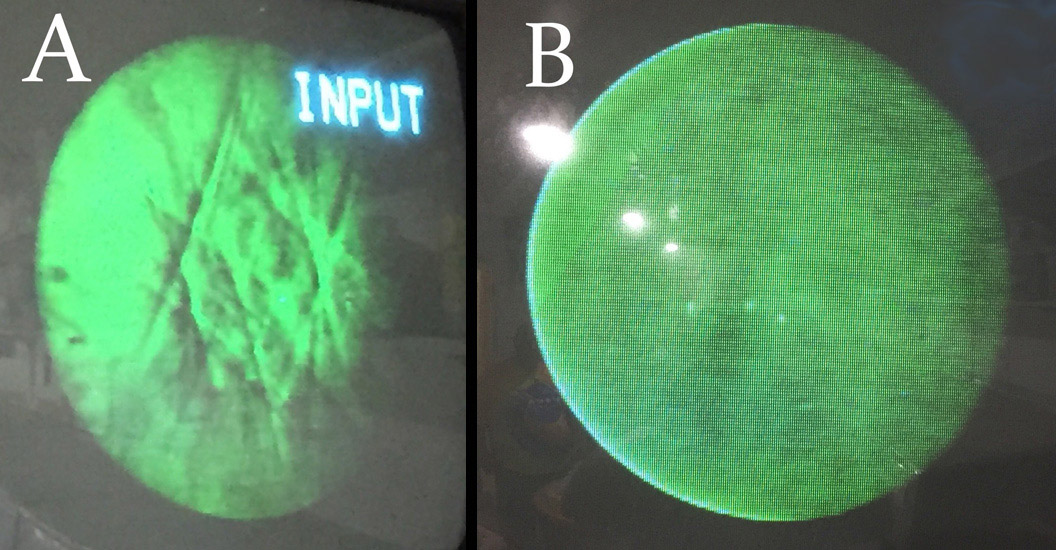
Foucault image of a mirror's surface before and after re-polishing and refiguring.
We had a dual station and single station working WWII era grinding machines at the Mirror Lab. They were used for a few mirrors. They took up quite a bit of space, required big grit to be inside and had a completely different understanding of the strokes than hand grinding. Once you get past that you could make excellent mirrors. We ended up selling them to make more floor space for hand grinding. The time to make a mirror was about the same by machine or by hand, although that may be due to lack of experience using the machines.
We always recommended that a new mirror grinder make their first mirror by hand. You can feel the smoothness or unevenness of the mirror. Amazingly, even in final polishing, if you have good contact and go slow, you can feel extremely small undulations in the mirror's surface and feel when the mirror is smooth. Hand grinding, for us, kept the grinding grits outside and the polishing inside reducing scratches.
If you want to look into making your own mirror grinding/polishing machine check out the Mirror-O-Matic.
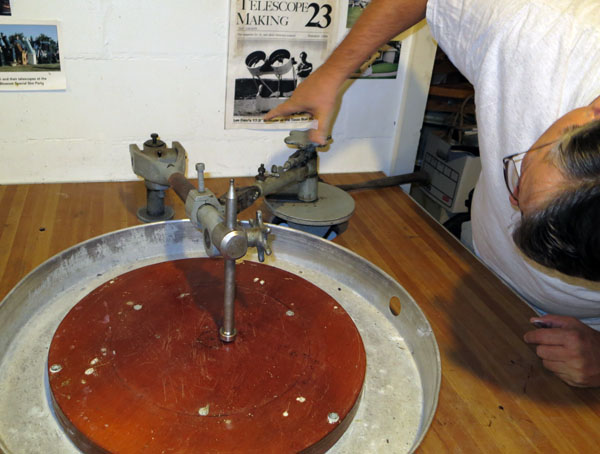
Adjustable arm on a dual station grinding machine.
Grinding machine with arms removed leaving the lab.
Every few years something pops up online about cerium oxide being radioactive. After a discussion at the lab Mike brought in his Geiger Counter, confirmed that it was reading correctly and then went about testing our various cerium supplies. They were all free of radiation. There's no guarantee that all cerium is radiation free but none of the samples that we tested showed radiation. This is the Mirror Lab's contribution to Myth Busters.
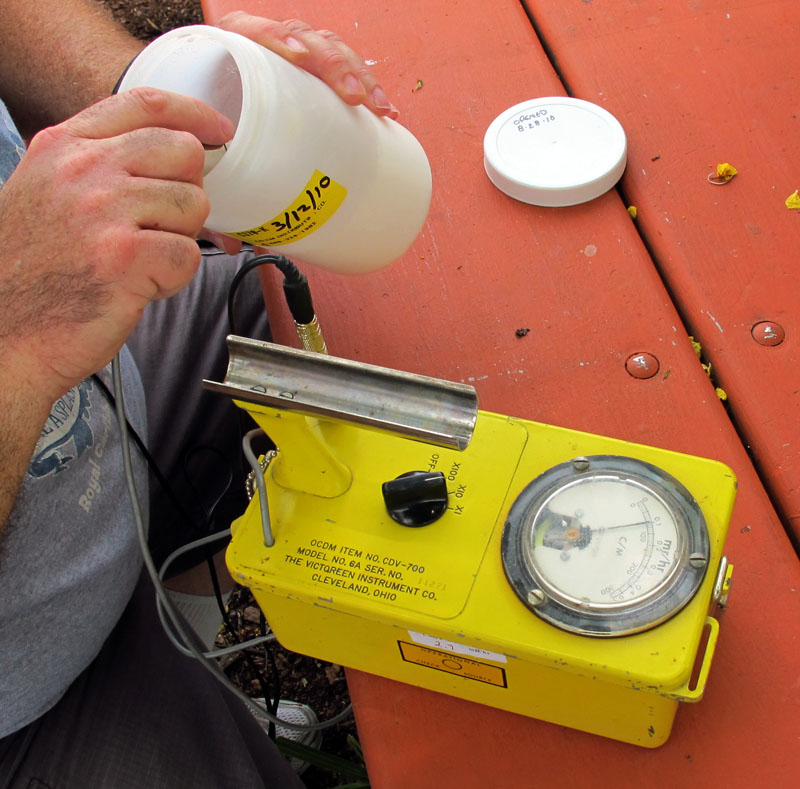
Using a Geiger Counter to test CeO.
When do you stop and say that the polish and figure are good enough? These are the numbers that I use and others may be different. For the polish it's when the mirror is really clean and the laser does not scatter anywhere on the mirror. For the Strehl it's a value of 0.9 or higher. The peak-to-valley (P-V) wavefront error of 1/4 wave or better in each of a 3+ multiple axis test and the edge should not be turned down.
If your mirror meets these values it should make an excellent mirror. In the test shown here the robo Foucault data was fed into FigureXP. The result is a 1/8th wave mirror with a Strehl of 0.986. The surface was well polished and the views through my 16" telescope back up these numbers.
Why stop at 1/4 wave? Generally I aim for about 1/6th wave. Realistically, I haven't been able to see more detail on a 1/6th wave vs a 1/4.5th wave mirror. Trying to gain an extra fraction of a wave does run the risk of messing up what would have been a really great mirror. What does make a big difference is a great polish vs a poor polish. The added contrast matters. Where a few 10ths of a wavelength might help is if you have really dark dry stable skys and you are looking at objects that have hard edges, like the rings of Saturn or the festoons of Jupiter.
To check the mirror on a finished telescope consider reading Star Testing Astronomical Telescopes by Harold Richard Suiter.
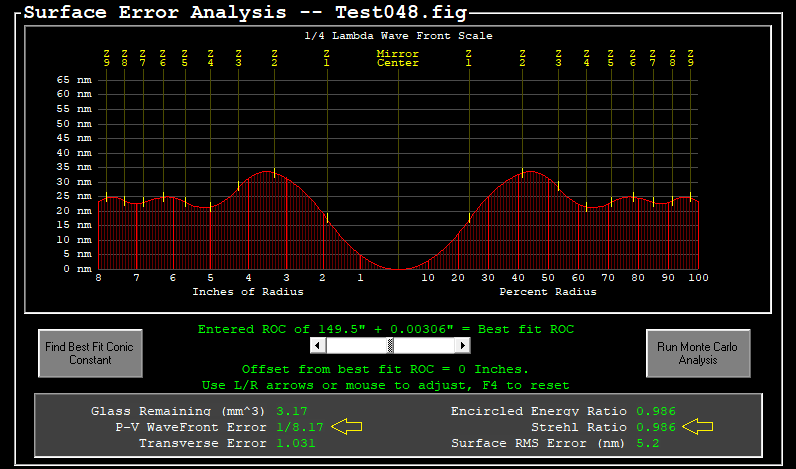
Robo Foucault test results of a 16" mirror (yellow arrows added)
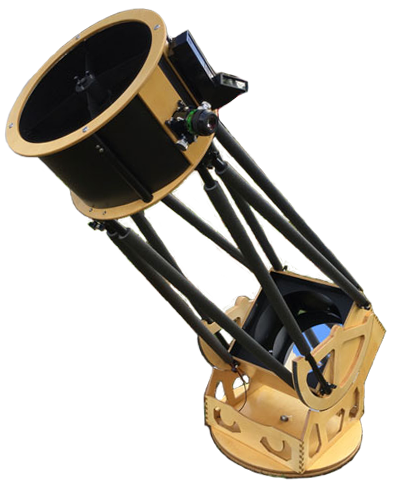
The primary mirror is the lynch pin of a great telescope. A well built optical tube assembly (OTA) that keeps the optics in alignment is also needed. As is a way to smoothly position the OTA and have it stay where it's placed. Even the best mirror will not live up to its potential if it can't be kept in collimation on a solid mount.
Make an awesome mirror and wrap it with an exceptional OTA and mount.
With some elbow grease and patience I and many others have proven that pretty much anyone can pull this off.
Now it's your turn.