SCUBA Tank Film Hypersensitizing Chamber
I'm leaving this here for historical info
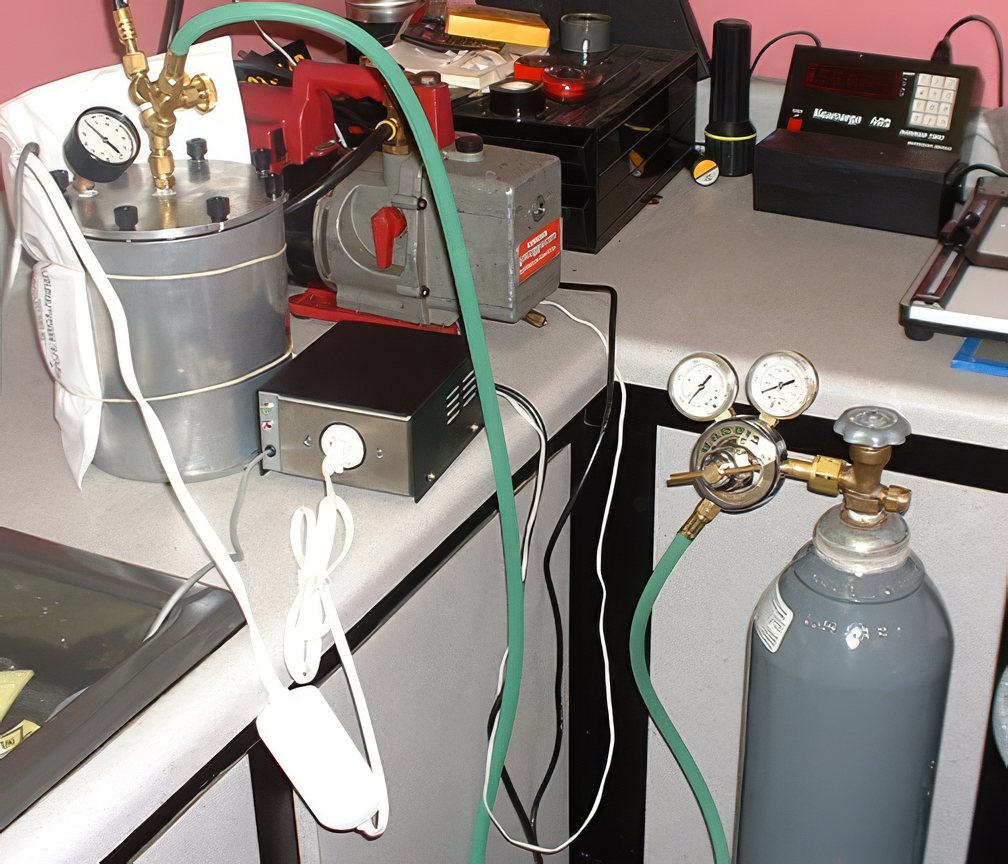
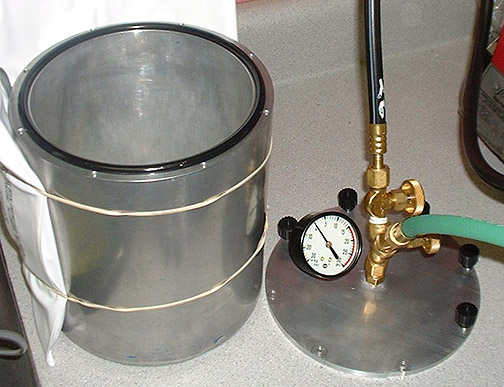
The finished hypering setup in the darkroom with hypering tank, heat pad, vacuum pump, temperature regulator and gas cylinder. Missing is the can that the hypering tank sits in with added insulation.
Gas hypersensitizing the film removes water and oxygen from the film via vacuuming and replaces it with a hydrogen nitrogen mix. This makes the film receptive to dim light for a much longer period than without hypering. In the case of Tech Pan it effectively doubles the ISO rating. The film should also remain O2 and moisture free while in the camera and until it is processed.
I'll start off saying that you won't save money by building a hypering tank this way, unless you have access to machining facilities.
I started off with the the modest thought slapping together a hypering tank out of PVC and using a hand vacuum pump. As projects often go, I ended up with a miniature bomb shelter and an industrial strength setup. I can only hope that, someday, I will do it justice with at least one decent astro photo ;).
The forming Gas was ordered from a local welding supply company (Crumpton Welding Supply) before the tank went to the machine shop. Due to some administrative mix-ups it was the last piece of the puzzle received after a three month wait. The good news is that with 80 cu. ft of the stuff I'll probably never run out.
My Hypersensitizing experiment lasted for about three years (2005-2008). The gas mix, vacuum pump and thermostats all worked well. I was using Tech Pan film for all tests. The fault was that I struggled to get the perfect drift alignment. My 30 minute perfectly exposed elongated stars were not up to my (or anyone else's) standards. It was fun to understand the process.
How it came to be...
While I have quite a few SCUBA tanks I really didn't want to cut one up. I remembered a dive buddy who had a old J-Valve tank that was waaaaay out of hydro (safety certification). He was willing to part with it for a steak dinner after our next dive.
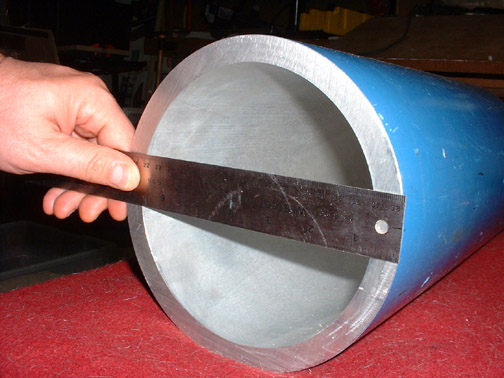
Since all I had was the tank and an idea I needed to find a local machine shop that could handle the cutting, milling and drilling. Northrop Machining in St. Petersburg,. FL seemed to have what I needed. The first step was to cut the tank to see how thick the walls were. This one was 9/16". Once we knew this we finalized the design and metallic carnage really began.
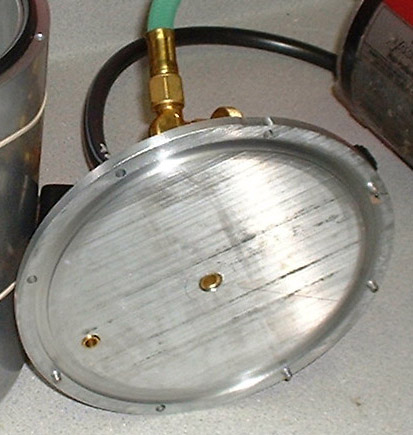
The basic idea was to use a single O-ring to make the seal between a groove in the milled tank top and a 1/4" aluminum plate with a shallower matching groove for the top. On the outside of this groove would be eight small bolts to hold the lid down during positive pressure. Two holes were tapped in the lid for vacuum/gas and the pressure gauge. While not a high-vacuum setup it will max out the gauge at 30" and hold it for days without noticeable leakage.
The first lesson learned was that SCUBA tanks, at least this one, are not actually round. This makes the machining of the groove a little tricky (=$$).
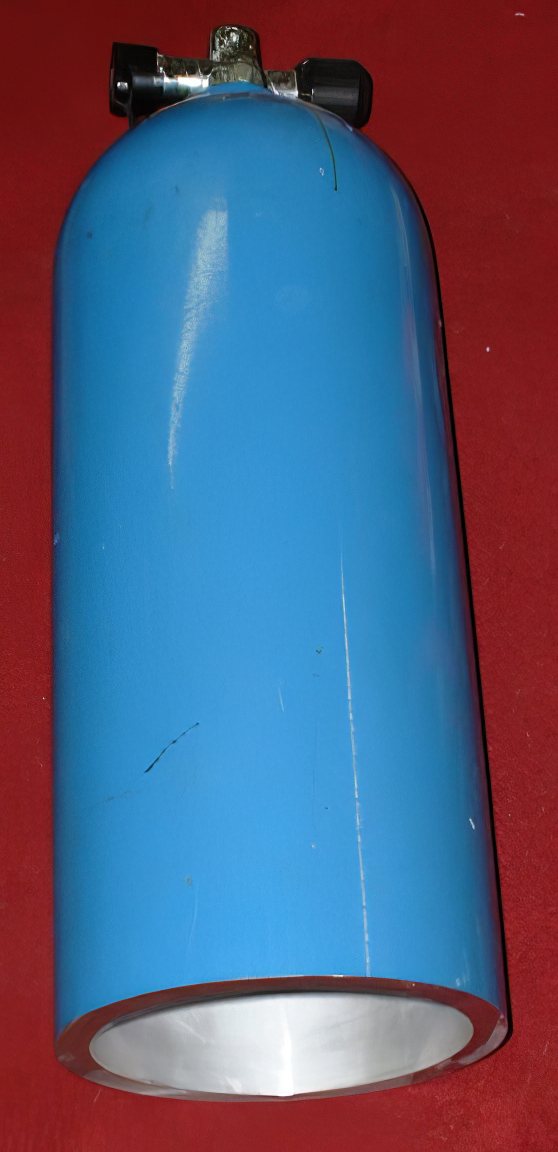
This is the scuba tank after 8" of the bottom was cut off.
Some of the pieces...
This is the finished tank with a Sunbeam heating pad around it.
This is the scuba tank after 8" of the bottom was cut off.
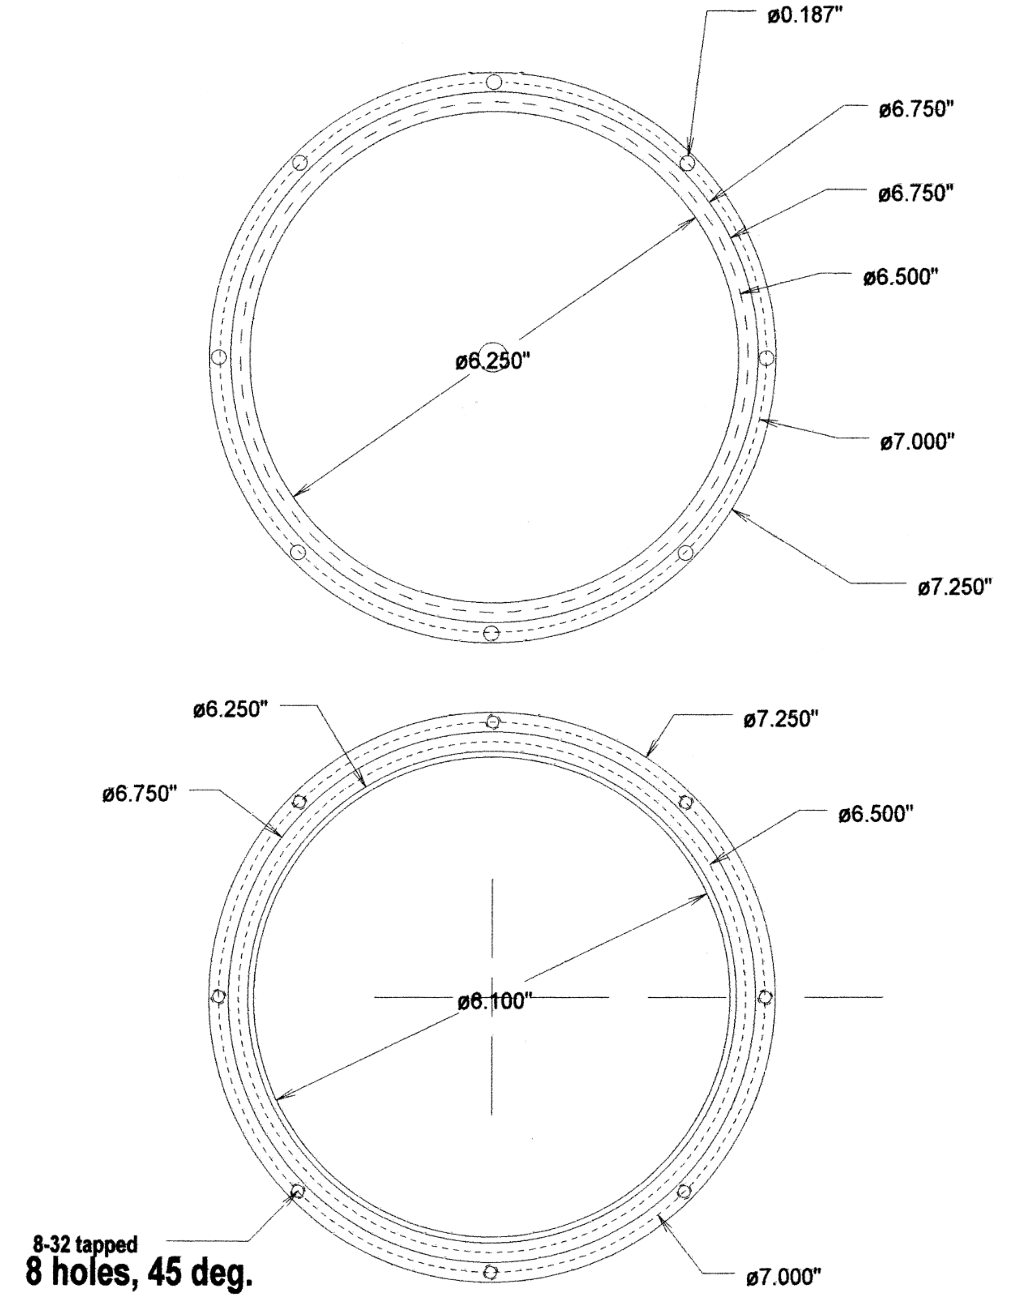
The CAD drawing that was used to make the vacuum tank.
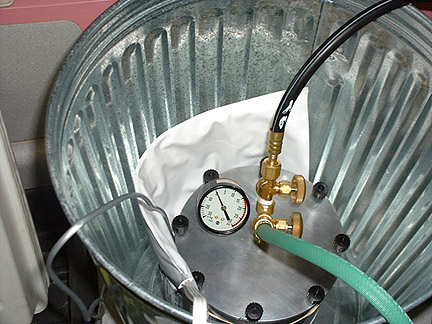
I wanted the hypering tank to sit in another container for insulation. While in a ACE Hardware I ran across a little galvanized trash can that was perfect. I added some fiberglass insulation which isn't in the photos.
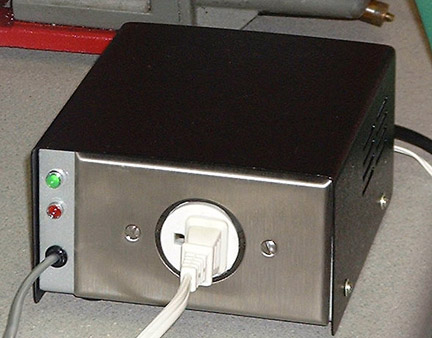
This is one of two temperature regulators I built for this project. This one is set to 50C and the other for 40C. The other one is a slightly simpler design using an extension cord with a built-in LED to indicate power instead of the red LED on this one..
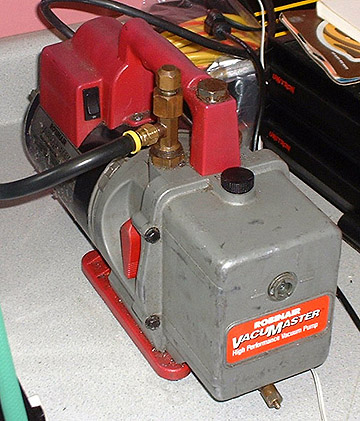
I combed the local pawn shops for over a month looking for a air conditioning service vacuum pump. Finally I was rewarded with this Robinair. It's rated at 20 microns, but my cheap gauge will leak a bit to prevent that much vacuum. A trip to the Goodyear hose guys allowed me to connect it from the pump to the 'Y' valve on the lid of the hypering tank.