The Eyepiece Case
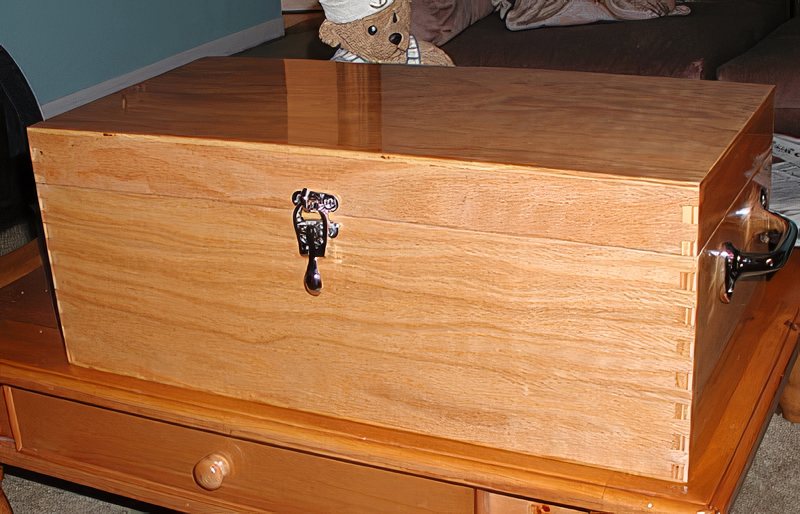
These photos of the case were taken shortly after its construction. The case looks as good after 21 years of use (2023) as it did then.
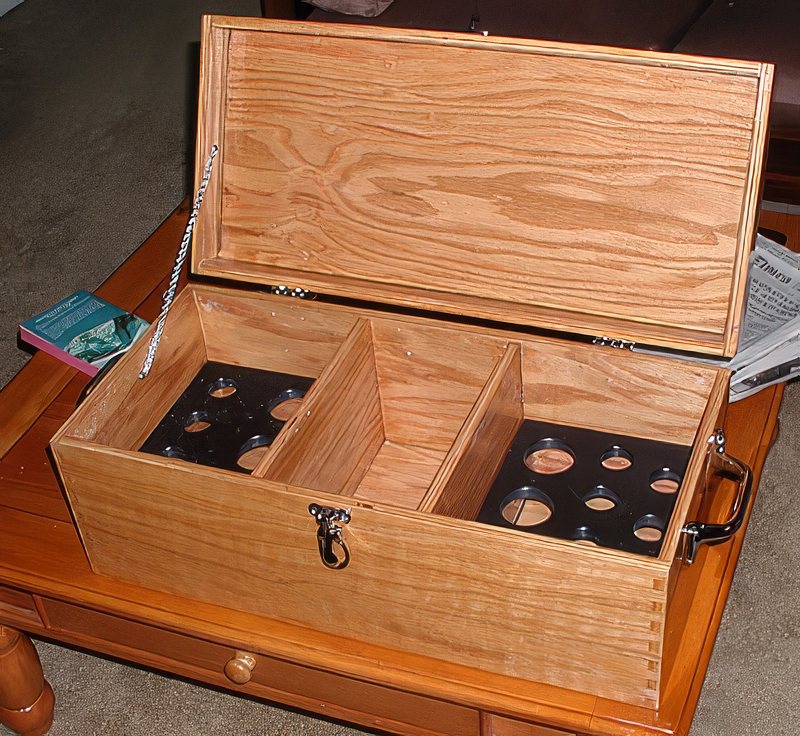
Back in 2002 I finally outgrew the small Pelican case that I was using for the past couple of years and went looking around for a new case. One option was a bigger Pelican case. Another option was to order a custom case from Wood Wonders. I liked most of the design of his large case and Oak would match my Megrez mount and chair. But between the delay due to a fire in the shop and wanting a few design changes I decided to attempt to make my own.
The first mission was to spec out the dimensions in detail. That turned out to be easy part.
The bulk of the case is made out of oak plywood. This is only my second project using oak plywood, the other was a drafting table. I didn't want wood for the eyepiece rack because I was concerned that the metal eyepiece barrels would eventually wear away the coatings and urethane and wood dust would get on the optics. An executive decision was made to use UHMW, which is a type of dense slick plastic that machines well. I have found a UHMW alternative at West Marine. It's a resin shelving material called StarBoard that comes in white or black and machines with wood tools. Locally it was $28 in 2002 for a sheet big enough for the eyepiece trays with some left over.
The other change was the construction of the box itself. Most wood eyepiece cases that I've seen use butt joints and screws. This gets the job done, but you're left with plugs or screws showing. I decided to use a box joint (also called a finger joint) for the corners. These are really strong and use no screws and, if made properly, look great (although solid wood has better end grain than plywood). The only thing is that I haven't made any box joints before. We'll get into that more shortly.
During a case construction discussion with Dean he mentioned that his case balanced better after moving the eyepieces to each side and leaving a clear area in the middle to hold filter cases and the like. It was a good idea so I borrowed it for this case. It also gave me two cross members to help support the bottom.
The 1/2" Oak plywood was purchased at the local Lowe's as a 4'x4' half sheet. This is almost enough for two boxes, or one box with mistakes, The UHMW came from WoodCraft. The side handles, hinges and the front latches came from West Marine. Now that the raw materials were in hand it was time to make some saw dust! Well, almost. time...
If you want the plans in Acrobat format go here: Eyepiece Case Plans.
I knew that the box joints would be the tricky part. After a little web research I ran across a thing called the Lynn Jig. This is a frame connected to the saw's miter gauge with a carriage that is moved with a threaded rod. Turn the knob a known number of times and make the cut, turn some more and make the next cut. With some leftover oak from previous projects and a visit to the local Ace Hardware I made the jig in a couple of nights. This could work! I found that adjusting the width of the dado blade was more difficult than the finger joint spacing. In hind sight it may have been better to make the cuts with the jig in the router. Maybe Next time.
If you go this route remember to cut the plywood so that the grain runs horizontally across the box or the finger cuts will be prone to tear-out. Even then consider using some sacrificial wood (I used hardboard) as a backing to prevent any tear-out.
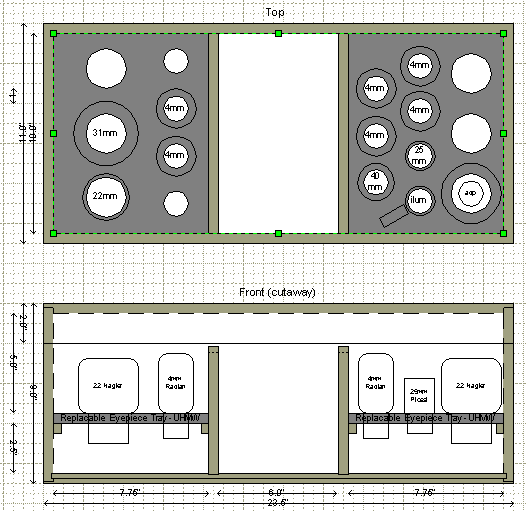
Every project needs a plan. The two vertical dividers will be drilled out for 1/4" dowel pins that will go into the front and back of the box, but not through so they will be hidden. This will also give them the vertical holding strength to help hold the bottom on. In the end dowels were not needed - more on that later.
Controlling Dew
Although I designed and have many electronic dew heaters this was a case where the simplest idea is the best. I toss a Hot Hands hand warmer in the box at the begining of the night (two if the humidity is really high). They generally last all night if I keep the lid closed when the case isn't in use.
If I really want to go light I'll use a Hot Hands and use a rubber band to attach it to eyepiece instead of using an electronic dew heater.
Lighting in the Eyepiece Case
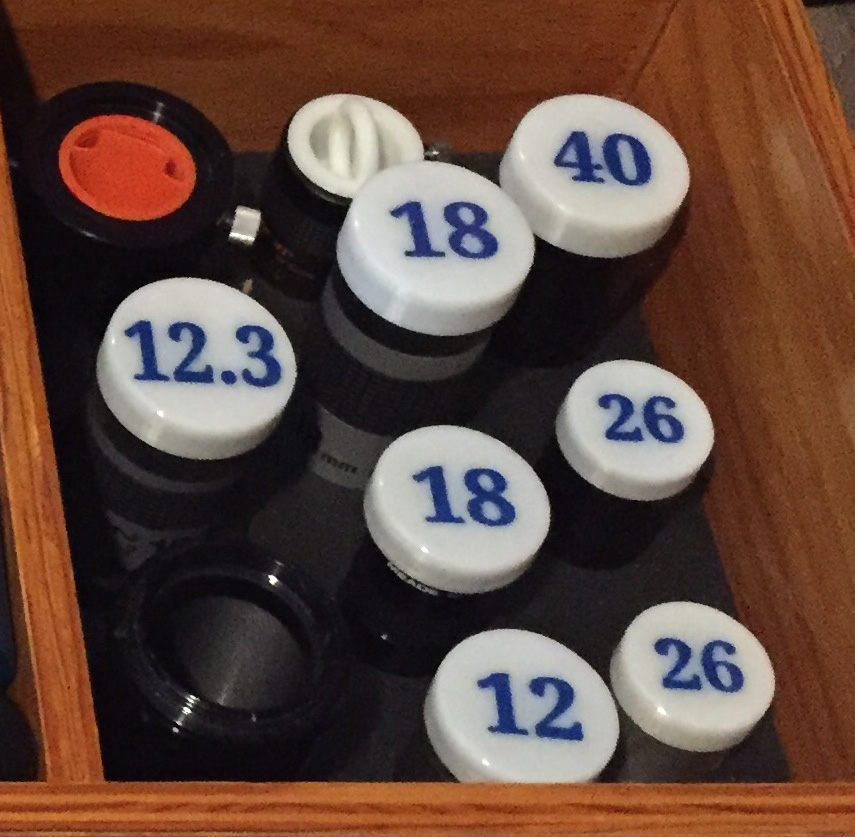
Of course the simplest plan is to use your red flashlight or a red Cyalume stick. I use a flashlight and I 3D printed glow-in-the-dark eyepiece caps. Each cap has the millimeter value of the eyepiece recessed in it and that is filled with an opaque paint and then the entire top of the cap is coated with clear bar-top (very hard and clear) epoxy for durability.
Tom, a fellow Astronomer and ace ATMer, built one of the PWM LED dimmers and added it into the lid of his case using a tilt switch so that it comes on when the lid is opened. He can still control the brightness with the POT.
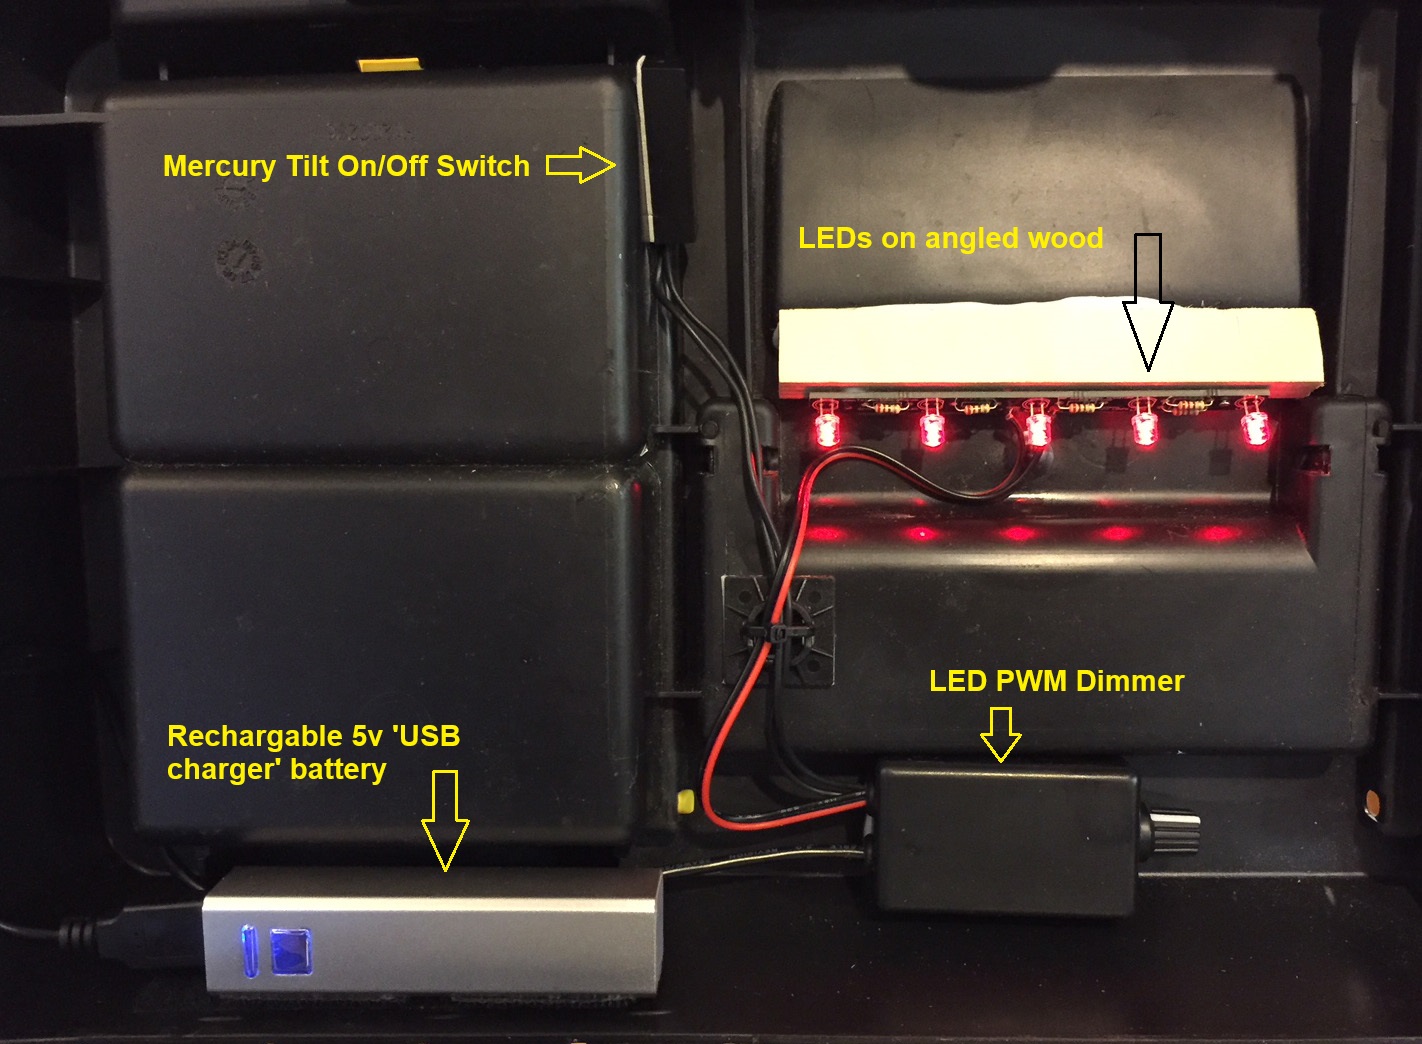
This is the inside of the lid of Tom's eyepiece case. The USB battery has an on/off switch. When on the lights will come on when tilt switch is also in the on mode.
Box Joints
With 1/2" box joint cuts the width of the cut, obviously needs to be a multiple of 1/2".; What is less obvious is that if you flip the board over to make a cut at each end of each board before moving the jig to the next cut you will need to end the board with a finger, not a cut. This requires a matching number of fingers and cuts, which becomes a multiple of 1". My box sides became 9" tall.
Now that I know that the box joints are possible the real project begins.
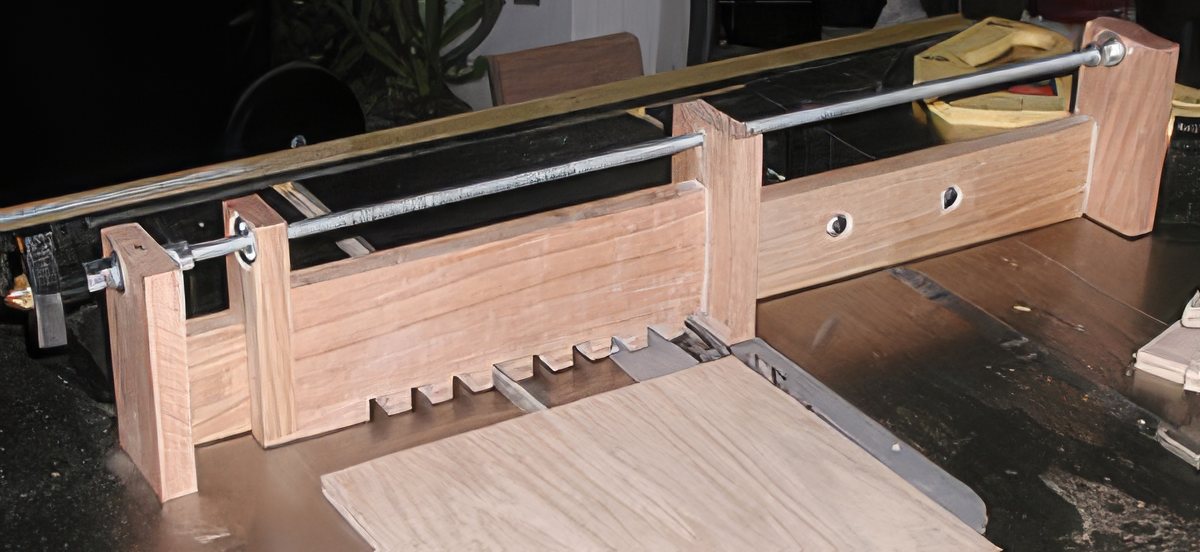
Here's the Lynn Jig. I'm setting up the starting point and blade depth here. The blade cut depth will be a little deeper than the thickness of the wood (1/2") and the protruding fingers will be trimmed with a router. Always run a test first. I liked this setup enough that I made a 4' version for making the mirror boxes on the 16" and 18" scopes and the rocker boxes on the 8", 12.5", 16" and 18" scopes.
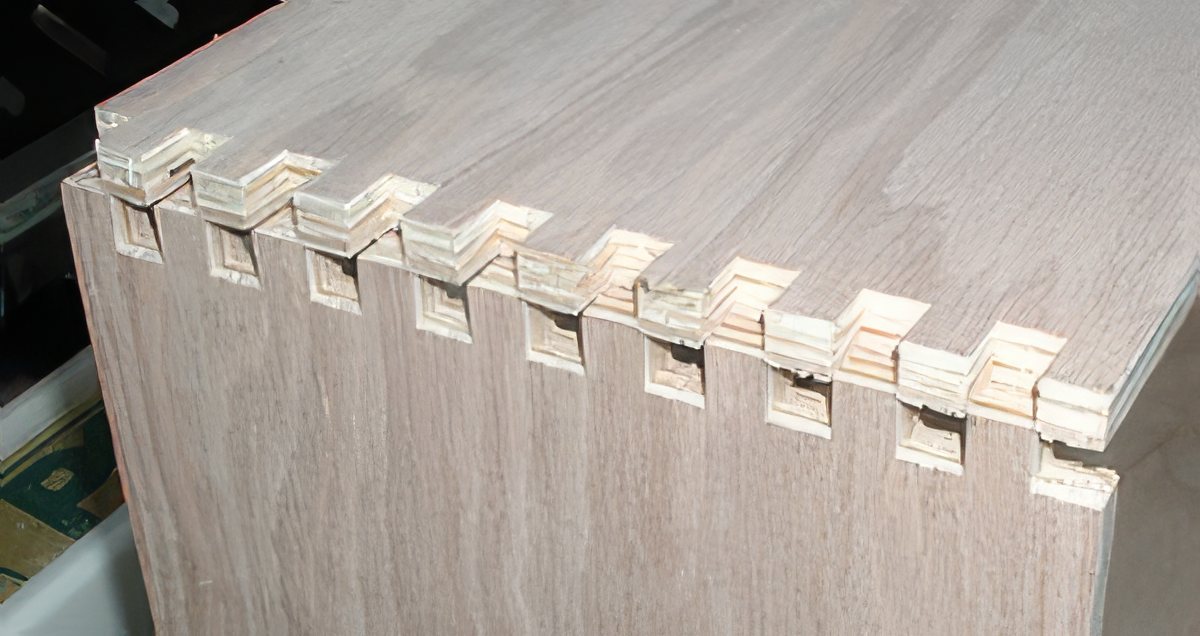
The joints fresh out of the saw before (above) pressing together and after (below). It's a snug fit but went together by hand.
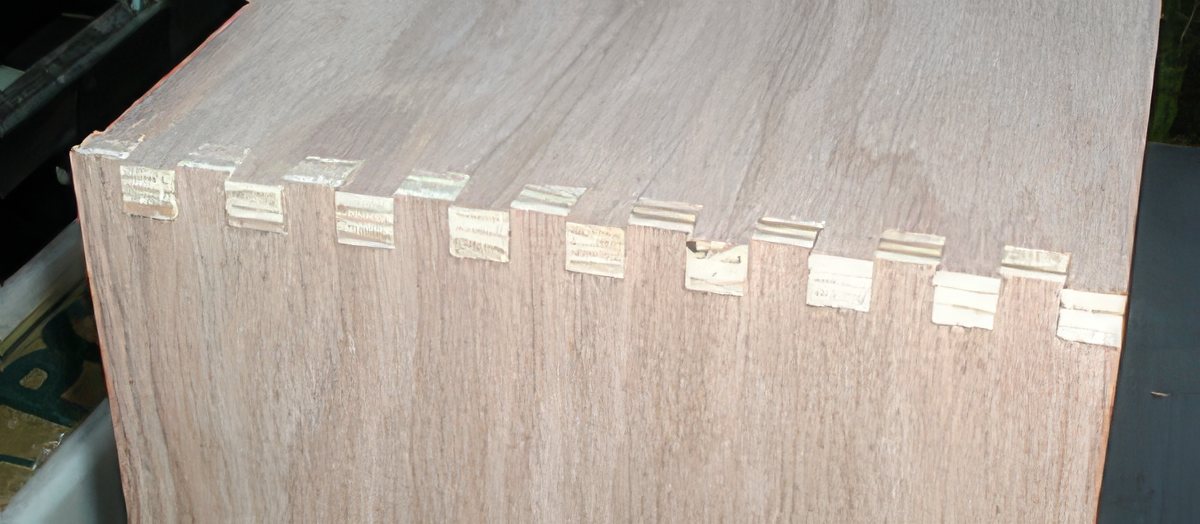
The fingers stick out a little and will be trimmed off with a router after gluing.
The Box Top and Bottom
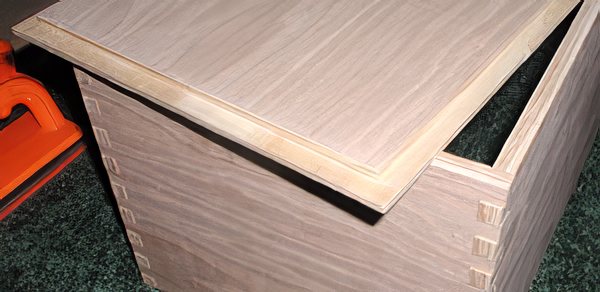
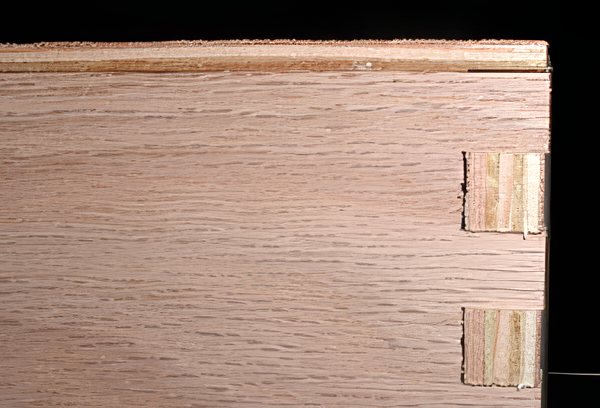
The rabbit serves two purposes. First, it shows less of that fine plywood end grain. Second, it offers additional surface area for the glue. This photo shows the fit without anything (other than gravity) holding it to the frame.
The top will be held on with urethane glue around the thin edge of the rabbit into the box sides and into two center vertical dividers. In the future I will use Titebond III wood glue which is much easier to clean up. This should allow about 51.75 square inches of surface area for gluing. Since this box will (hopefully) never be turned over additional strength shouldn't be needed.
The bottom will be similar to the top except that it will be made of two 1/4" pieces of Oak plywood. The first will fit into a dado (groove) around the sides. It will also be glued to the bottom of the two dividers. The second piece will fit on bottom against the first and extend out over the edge of the sides covering the end grain like the top does, only thinner.If all goes well there will not be any hardware (screws, braids, etc) holding the box together. I will use some to hold the hinges, latch and handles on.
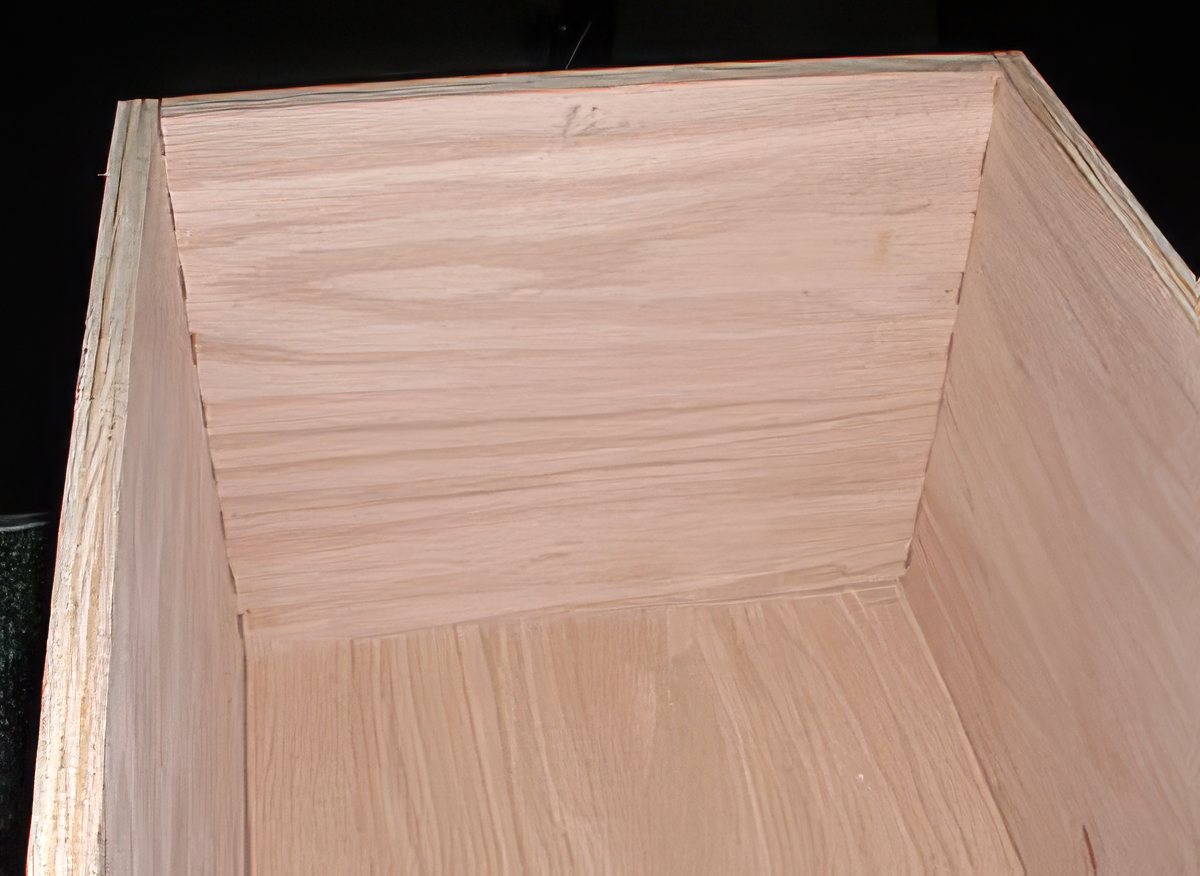
Above shows the inside with the top on (upside down). It's a nice tight fit, especially when you consider that there isn't anything holding this together except the friction of the pressed together box joint.
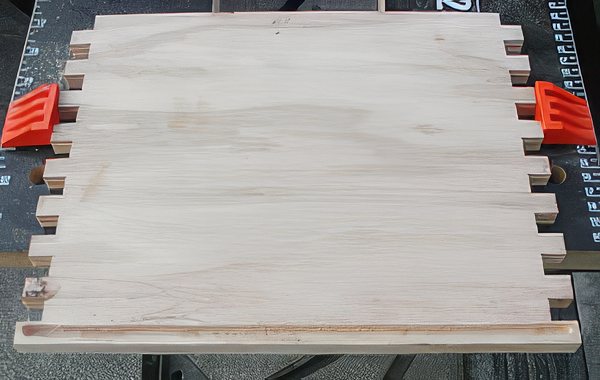
Here's the dado on one of the ends for the bottom panel. Notice that it does not go all the way to the end so it won't be visible in the finished box.
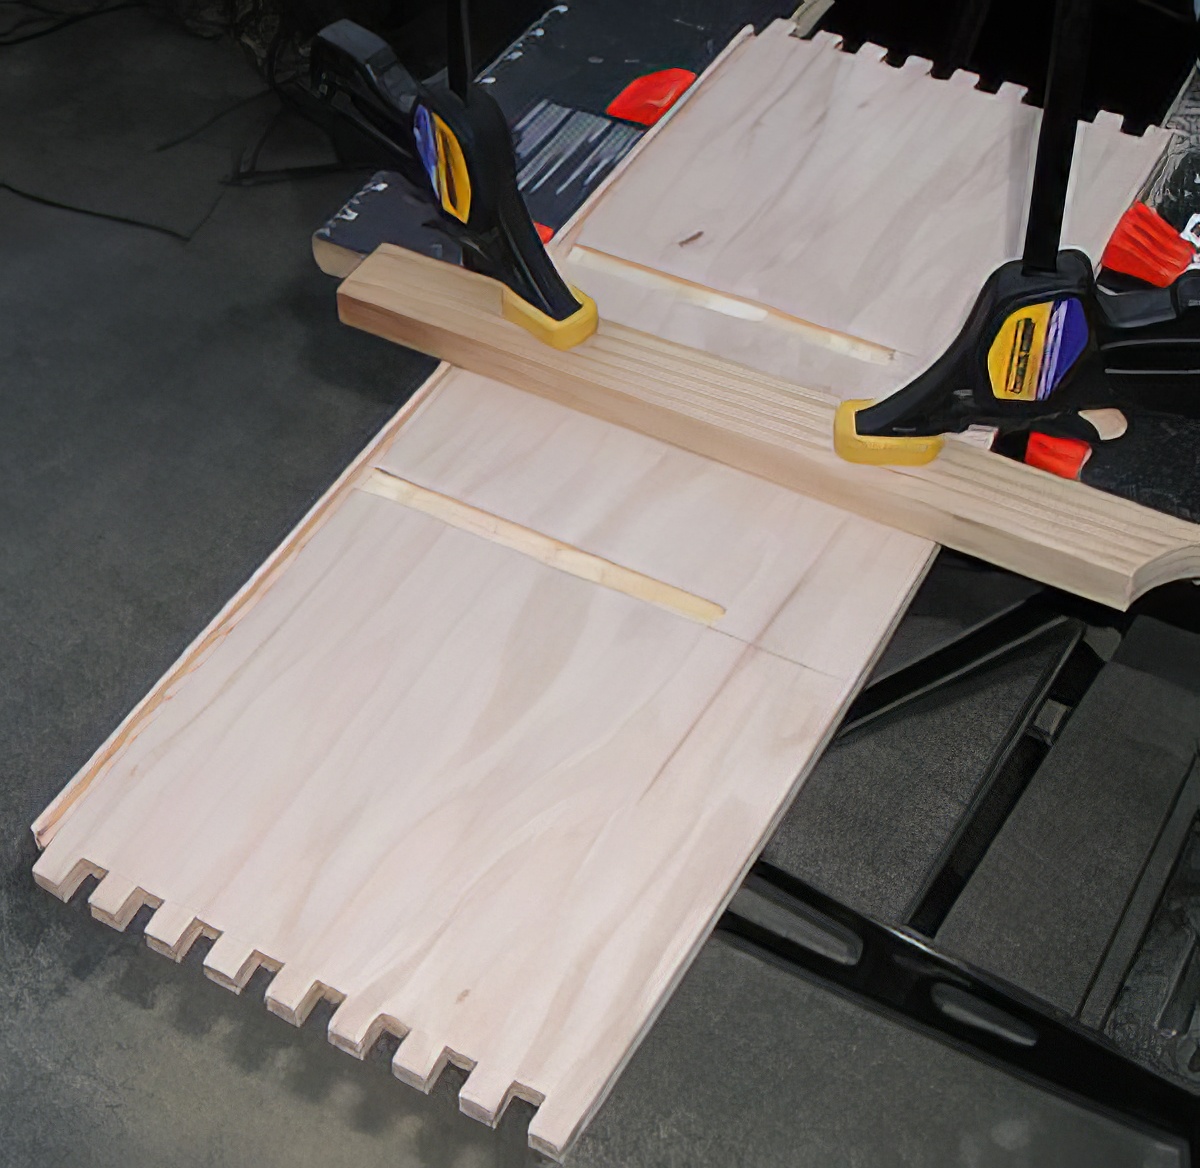
Here's the front with the dado for the bottom panel cut and the shallower dados for the two divider pieces. The edge guide for my router wouldn't reach far enough in so the clamps hold a temporary edge guide. The divider dados go from the bottom cut to 1/4" to where the lid will be cut off. The dividers are notched at the top to extend slightly above the dado and hide it.
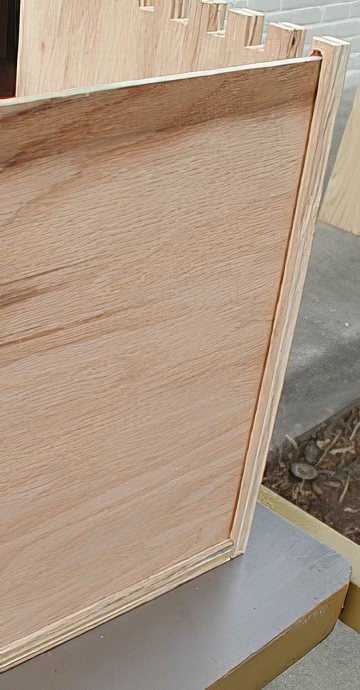
This is a test fit of the bottom panel with in the slots. I'll replace this discolored bottom panel with a clear one before gluing.
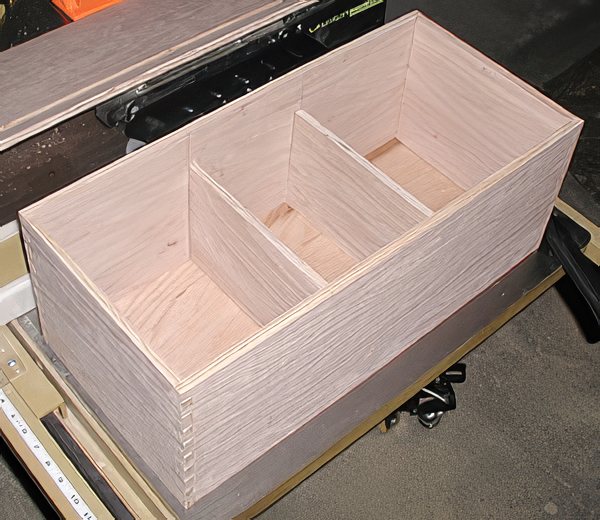
We're getting close now. The box is pressed together to test fit everything except for the rails to hold the eyepiece trays, the second bottom panel and the top. This part will be glued up first and the top and second bottom will be added on the second glue up. I put the bottom in upside down in the test fitting and the darker wood is showing. I'll get it right, I hope, during glue up.
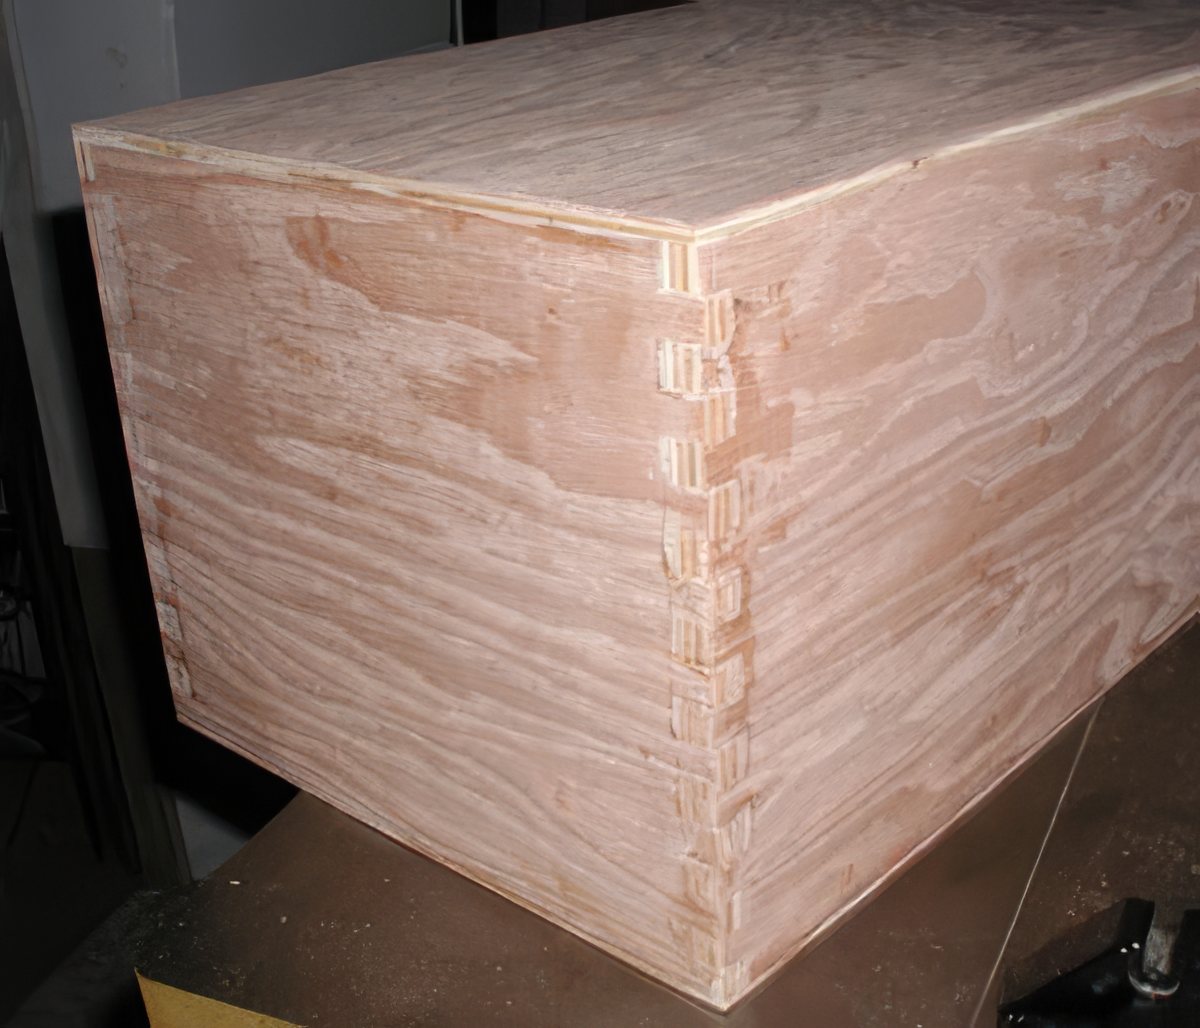
The sides, two dividers, bottom and top are finally all glued. The bottom was added after the dividers and sides dried and the top was added last. Although I used urethane glue before it was a real pain to work with on so many surfaces. A friend with more experience than myself called urethane glue and finger joints a suicidal combination. During glue up I agreed, but this should be able to weather a monsoon without coming apart.
A flush bit (straight cut with bearing on the tip) on the router was used to trim the fingers smooth - this is why the fingers were cut a little long (deep actually) to begin with. The top and bottom were then ran through the router to flush up their edges. It sure beats trying to sand everything smooth.
I did a bit of deep thinking about whether I wanted to make the dividers permanent or moveable. In the end I decided that permanent would prevent the eyepiece holders from moving and generally protect things better when moved around. It turned out to be a good call.
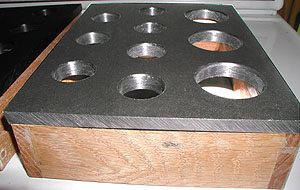
The eyepiece trays are the heart of the case. I chose black Starboard and built some 1/2" solid Oak frames to support them. The underside of each tray has a shallow rabbit to rest in the frame better. The Starboard cuts nicely with standard woodworking tools. Drilling the holes created a long stream of thin plastic, which is a little different from drilling wood. After the holes were drilled I used a 1" drum sander on the drill press to add a little extra space for the eyepieces to slide in and out easily. The final touch was a 1/8" round-over on the top of each hole.
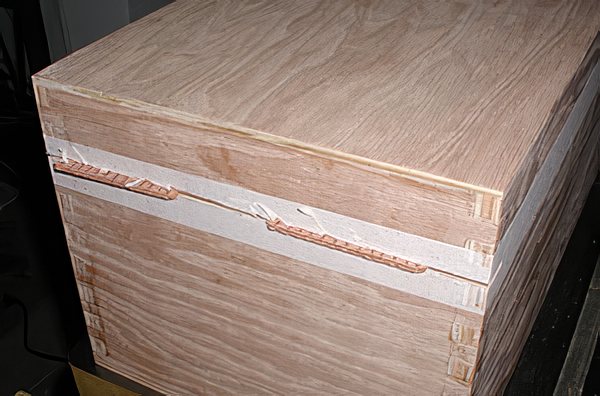
I put the tape around the perimeter to help prevent tear-out and as a way to mark the top and be absolutely sure that I wasn't cutting off the bottom by mistake. After cutting the two ends I wedged in some shims that were precut the kerf (thickness) of the saw blade and prevent the lid from closing up during the final two cuts.
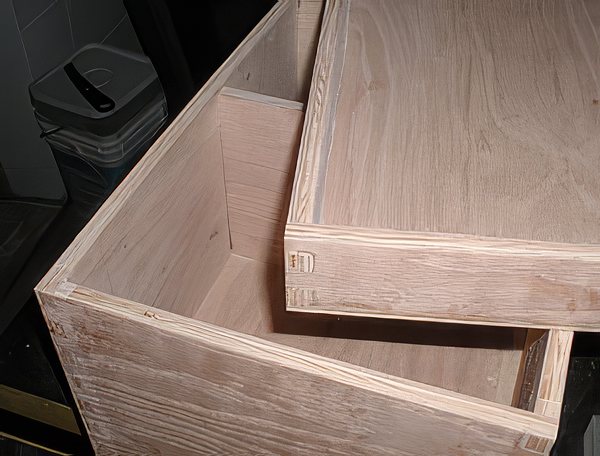
We have a successful lid cutting (big sigh of relief) two inches from the top. when the lid is on it's difficult to see that the box is cut. It's not flawless, but a little sanding should fix it up.
The frames will have a shallow dado around the outside perimeter and some thick felt will be inlaid in the dado. The felt will protrude slightly and press against the inside of the main box to act as a shock absorber. More 1/2" felt will be on the bottom of the tray so only felt should touch the main box.
This eyepiece case was my first attempt at making a wood worker's box and not a carpenter's box. The former used design and glue the latter uses screws and glue to hold it together. I wanted to minimize the visible hardware holding things together. This became the basis for the rocker and mirror boxes used in my telescopes.
