Upgrading the Losmandy G11 Mount from Manual to Computer Controlled Go-To
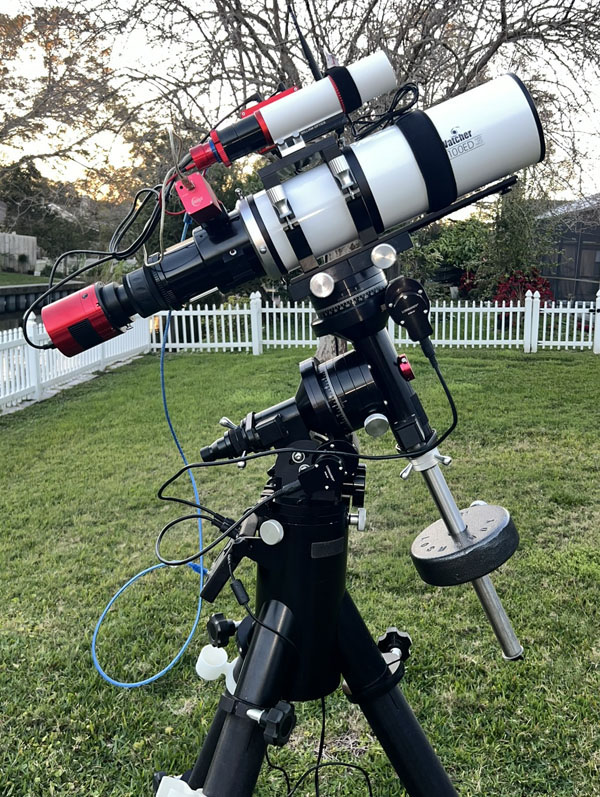

Unlike most telescope mounts, the Losmandy mounts were designed so that they may be repaired, modified and upgraded. When I bought my G11 there was no go-to option, although it tracked beautifully. I added encoders to it for digital setting circles. I replaced the soft rubber motor dust covers with hard Delrin covers. In the process I disassembled the RA and Dec shafts and understood how this mount was designed. That made me more confident that I could identify any issues should they arise in the field (they didn't). The Gemini controller was designed as a user installable upgrade that involved new motors and controller board (more about this below). Anyone that can handle a screw driver and a hex wrench should be able to preform this upgrade. I have seen many comments that Losmandy owners are the only ones that spend time upgrading their mounts. This may be true because we have the only mounts that were designed to be upgraded. Hats off to Scott Losmandy and his team for designing a mount that was made field upgradable to be more capable now than it was years ago.
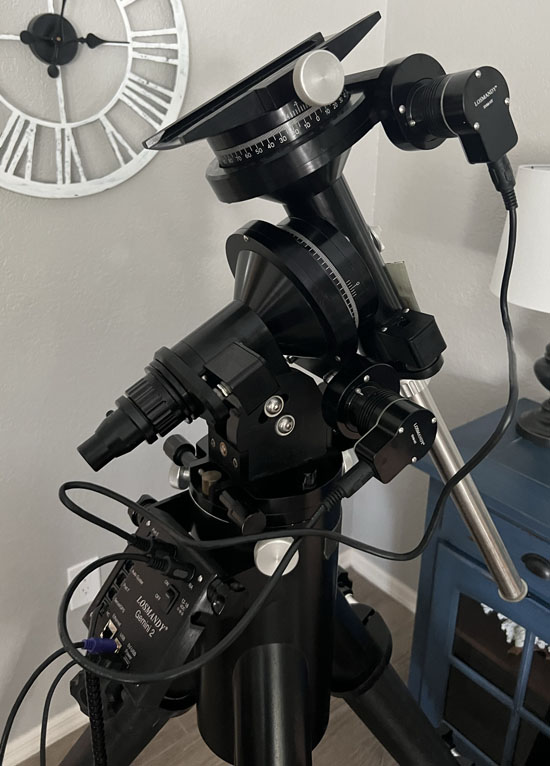
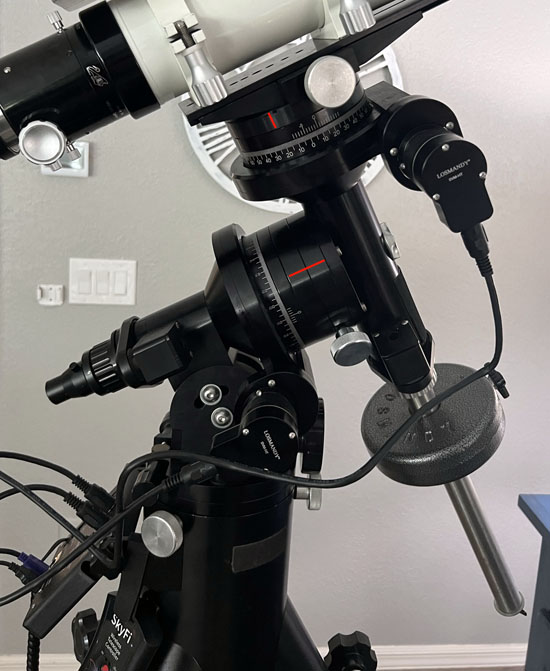
This is the finished G11 after the Gemini 2 upgrade. This started out a classic G11 mount from about 2002 with stepper motors for tracking. It was officially sold as a 'CG11' with the 'C' part being the Celestron 11" SCT that was part of the package with the G11 mount.
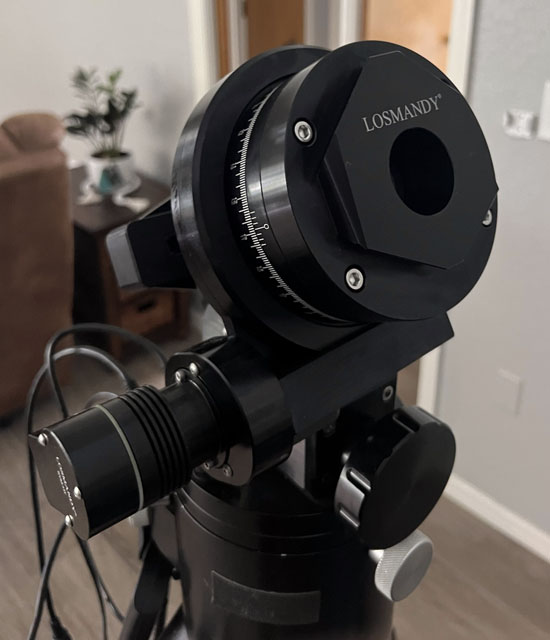
I added encoders, digital setting circles and Delrin motor covers soon after setting it up the first time. It tracked the night sky nicely but go-to wasn't an option then. Over the years Losmandy offered a go-to upgrade option. First Losmandy offered the Gemini, then the Gemini 2 and most recently the Gemini 2 Mini. The Mini is what I installed. The upgrade went remarkably smooth with the exception of a couple of holes that didn't quite align on the gear case and needed a bit of filing. The Gemini 2 Mini upgrade required about an hour and regreasing the bearings another hour (more on that below). This upgrade includes the motors and is Losmandy part GEMINI 2 KIT. The second photo shows the RA and Dec extensions added (red lines added to show the new parts).
These prevent the mount from hitting the new motors and the RA axis will now separate. More on that below also. The update was made a week ago (7/2023) and the sky has remained cloudy with a good chance of rain. It appears to work both with the hand controller and with Sky Safari using a SkyFi. Losmandy offers an option called 'tucked motors' that flips the motor so that it's next to the right ascension (RA) or Declination (Dec) axis in a safer position. This, unfortunately, requires sending the G11 head back to the California machine shop for modifications.
The Gemini 2 Mini is the third iteration of the Gemini series with the original Gemini, the Gemini 2 and the latest, the Gemini 2 Mini.
After you have finished the upgrade and the hand controller is making the RA and DEC axis move make sure to watch some of the Losmandy videos, especially the videos about Gemini 2 initial setup and setting the RA East and West safety limits.
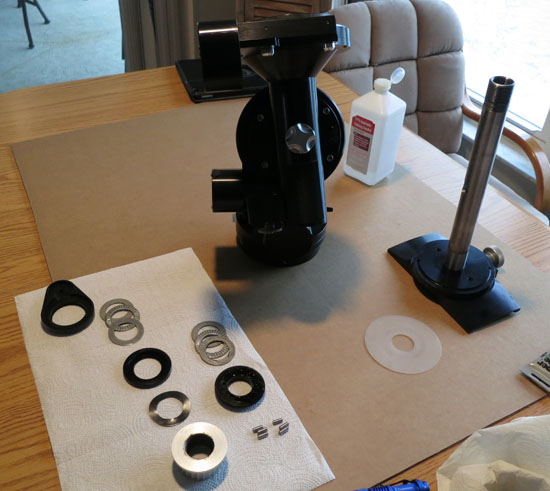
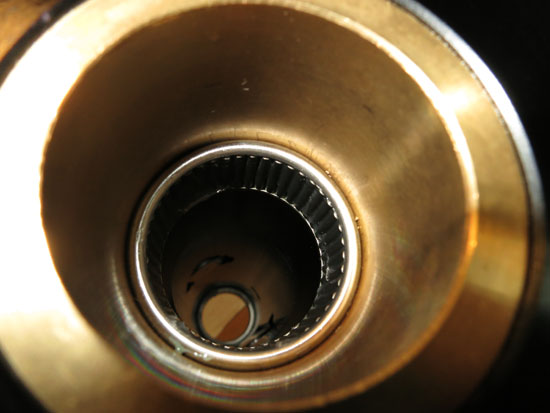
Since this mount had the original 20+ year old grease in it I decided that regreasing was in order. Each axis was disassembled, cleaned with alcohol and a new coat of Super Lube-21030 Synthetic Grease was applied. The needle bearings were wiped with alcohol dampened paper towels and rotated to get the old grease out before applying the new grease. The shafts and friction pads were also cleaned. it's important to reinstall everything in the reverse order that it came off. Watch a youtube video on the procedure. If you have encoders there will be an encoder gear with six small pins that go through the gear holes. This was a rather ingenious way to allow the gear to float while still allowing the clamping knob to be tightened down. I cleaned and very lightly greased each pin before reinserting it into the gear. The photo shows the Dec axis disassembled before cleaning and regreasing.
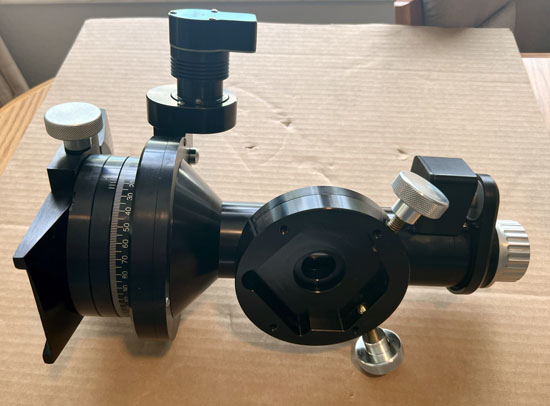
Officially the G11 Extension Kit (Losmandy part RAEXK) is used to allow a 'Meridian flip through'. Really what it does is prevent the mount from hitting the servo motors that stick out quite a bit. Since this allows the scope to point beyond Zenith on both sides it does allow a Meridian flip through. A huge bonus is that after the upgrade the RA and Dec axes may be separated and combined accurately without tools. If you upgrade from an original G11 without Gemini to a Gemini with Servo motors you will need this extension kit. This upgrade is extremely easy to install and took me under 30 minutes. If you have the tucked motors you don't need the Dec extension and look for Losmandy kit RAEXT.
In the future I will likely send the mount head back to Losmandy for the tucked motor upgrade. As you can see, the untucked motors stick out pretty far and I need to be careful storing and moving the parts around. Additionally, they are more likely to hit the mount if the limits are not set correctly. Having said that I have never had a problem since I upgraded the motors.
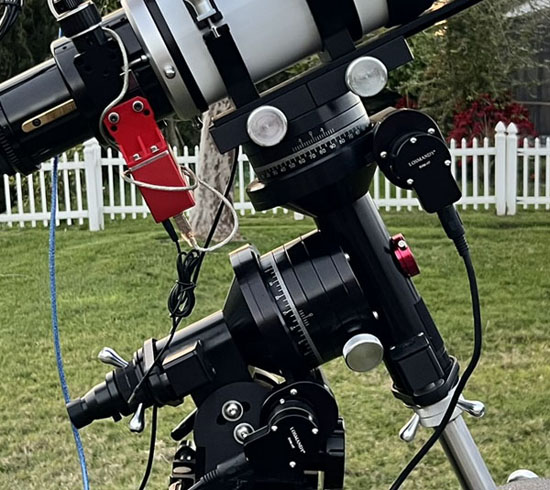
The new G11 saddle came in. It has dual clamping knobs and handles both Losmandy D and Vixen plates. This is Losmandy part G-11 SPDV. The new clutch knobs with handles are were also installed. These are Losmandy part CKS.
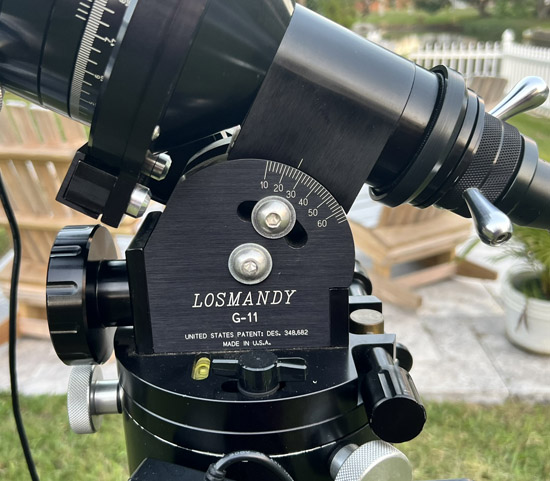
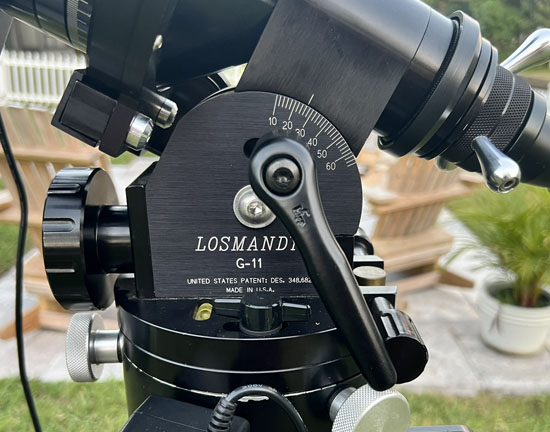
To angle the head up or down for polar alignment there is a pivot bolt and a clamping bolt. The clamping bolt has a hex head and requires a hex wrench to tighten or loosen it. Since every other assembly and adjustment on the G11 can be accomplished without tools this was annoying. I don't like annoying things, yet I have had many cats over the years.
There is a semi-circular slot that the clamping bolt moves in. Fortunately for me, my latitude is near the center of the slot when the tripod is level.
The solution was a Kipp K0122.4A41x30 clamping lever. It's easy to loosen during polar alignment and tighten when finished. The spring loaded handle pulls out a bit allows the handle to be repositioned. So-far I have not had any issues with the cables catching on it during remote mount control.
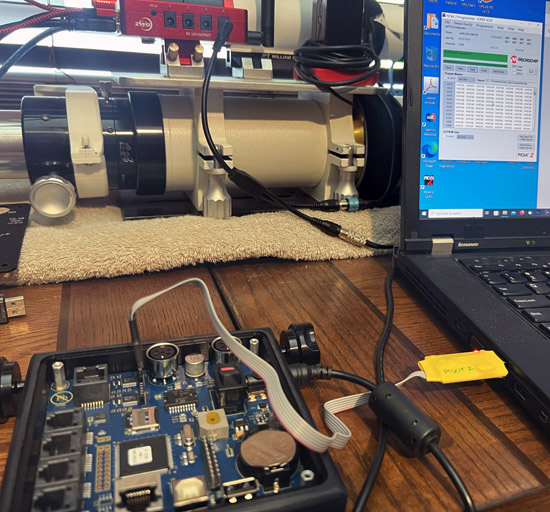
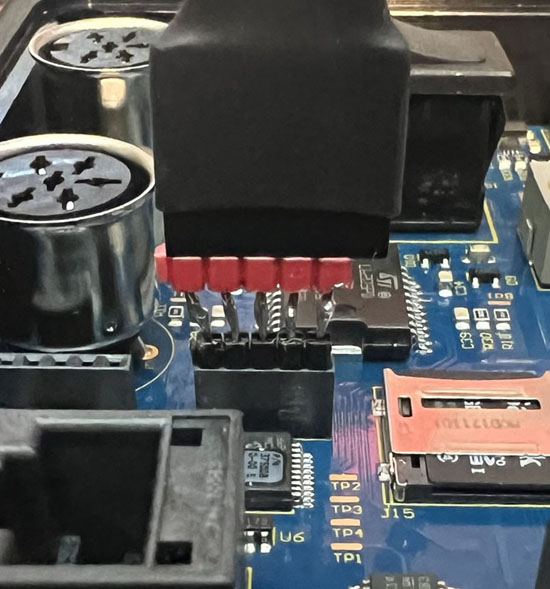
Losmandy released the Level 6 firmware in June 2023. This is the most substantial upgrade since the release of the Gemini 2. The biggest installation change is that in addition to the micro SD card update both of the PICs microcontrollers that control the servo motors needed to have new software flashed to them. This was a really straight forward process thanks to the in circuit programming (ISP) headers built into the Gemini mini board. It also helped that I already had a handful of PC programmers and programmed them for other projects.
The Gemini Mini ISP header used 1mm separated pins found on SMT boards instead the 1.54mm that I usually use for through hole boards so a 1.54mm to 1mm was made to connect the programmer's cable to the header. In the end everything worked perfectly and the PICs, micro SD card and the hand controller were all reprogrammed and rebooted in about 45 minutes.
The new PIC code will allow smaller motion of the motors for better tracking. The SD card changes now allow following faster moving objects like comets as well as other updates and bug fixes. All that I need now are some clear nights to use it.
Make sure that the micro SD card is fully seated or you will gen an error starting up Gemini.
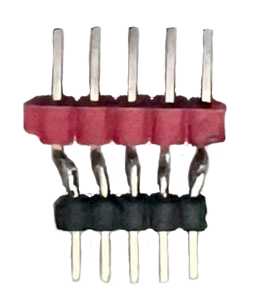
The 1.54mm to 1mm adapter was the secret sauce to connect the PIC programmer to the in circuit programmer header.
For a while I was having issues with anything near Zenith. I reset the East and West limits making sure that there was a bit of an overlap on both sides and that cleared up the issue. Since then this mount has preformed perfectly. The manual adjustments used for polar alignment have some backlash when you change directions so it's best not to overshoot the direct that you are moving the mount. Mostly using a 550mm telescope I haven't seen any issues that would require a higher precision worm gear. It works beautifully with the ASIAir Plus. The G11 Gemini is solid, well performing mount with a reasonable price for its quality and abilities.
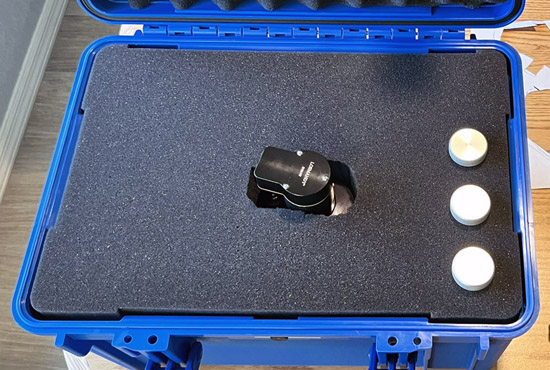
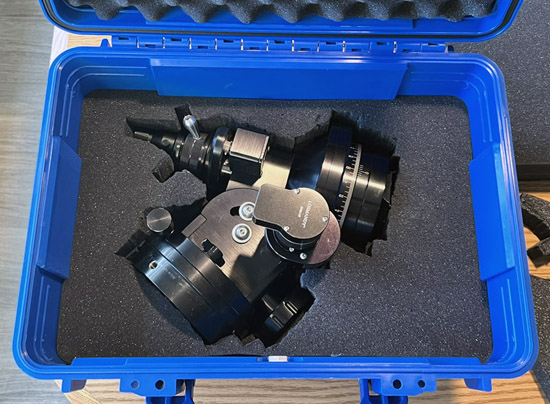
Since I do not have the tucked motors (yet) I really wanted to protect the G11 mount from damage. I dug through online archives searching for an appropriate case for the G11 mount. Some were large Pelican cases with wheels and others were the Losmandy cases. Now that the RA and Dec axis separate I decided to go with a pair of cases, one for each axis. After carefully checking the internal case dimensions of the parts I settled on a pair of Condition 1 - 18" cases #997.
The first case photo shows the RA axis with the bolts that attach it to the G11 tripod. I also keep an old Silva compass in there (not shown) to help with the initial tripod setup.
Each axis was traced on paper and the foam was cut layer by layer only cutting out the part that was needed for each depth. A very sharp fishing filet knife was used to cut the foam. The only foam option was partially pre cut pluck out foam. I pretty much ignored the foam cubes and cut where I needed the holes. Layers that were not supposed to lift out were double sided taped together (tape was supplied with the case). The last two layers, not counting the lid foam, were also taped together. These last two layers lift out to fully access the axis.
The second case photo shows the RA axis with the two top layers of foam removed.
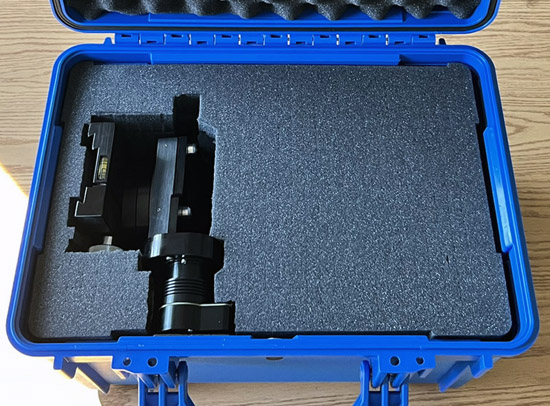
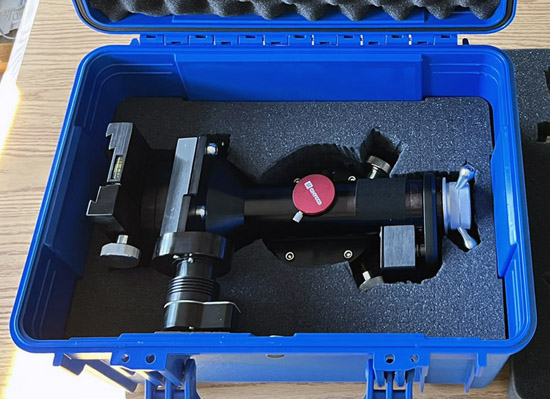
These cases add about 9 pounds each to the mount's weight. I find each loaded case is quite manageable. The cases were designed to stack so they don't slide around on each other. The photos show each case with and without the top two layers foam in place. The close firmly and should protect the G11 mount nicely.
The third case photo shows the Dec axis with all of the foam in place. I probably should have moved the Dec access a bit lower (towards the hinge) in the case but there is some padding between the servo motor and the case.
As with most cases like these they are water tight and have locking points. The grip has a little rubberized padding. The 997 case does not have wheels and isn't large enough to justify having them.
The last case photo shows the Dec axis with the two top layers of foam removed. A block of half thickness foam is under the motor and was taped to the lower foam.
I added 2" stick-on RA or DEC letters to the outside of the appropriate case for easy identification.
If the mount is controlled by an external computer, like an ASIAir, the hand controller doesn't need to be plugged in unless you are configuring the Gemini controller.
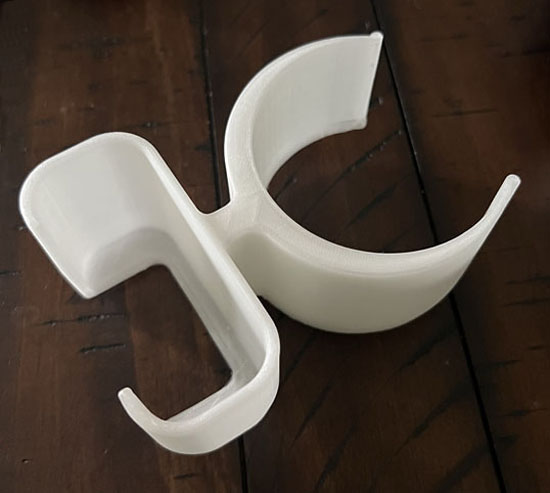
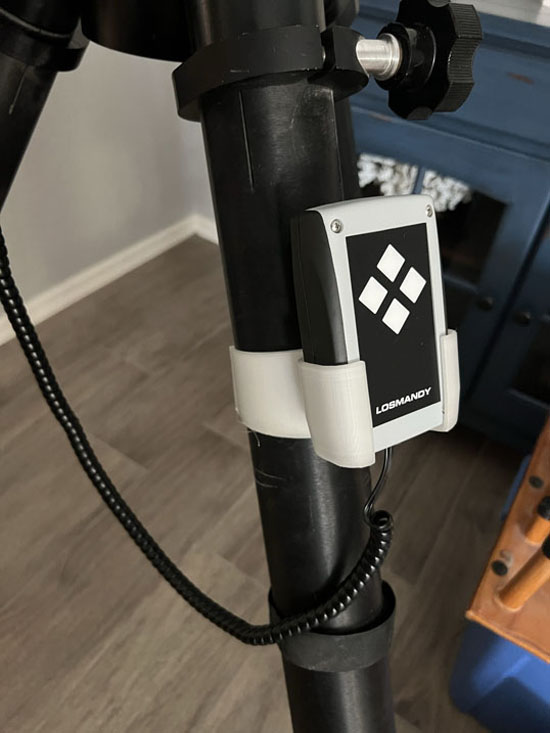
After seeing the high quality machining and parts I was surprised that there wasn't any holder for the hand controller. Draping the cord over a leg clamp knob wasn't exactly elegant. The old stand-by of using Velcro wasn't ideal with a two sided hand controller. A quick search turned up an STL file for a 3D printer that made a beautiful hand controller holder that snapped around one of the heavy duty G11 tripod legs. I decided to print it in ABS glow in the dark plastic. This holder will have a very dim glow for hours making it easier to locate and place the hand controller. It appears that there is a similar holder available on ebay for about $35.
Notice that the hand controller holders are printed using glow-in-the-dark ABS (it glows very dim) and the power brick holder is printed in red ABS.
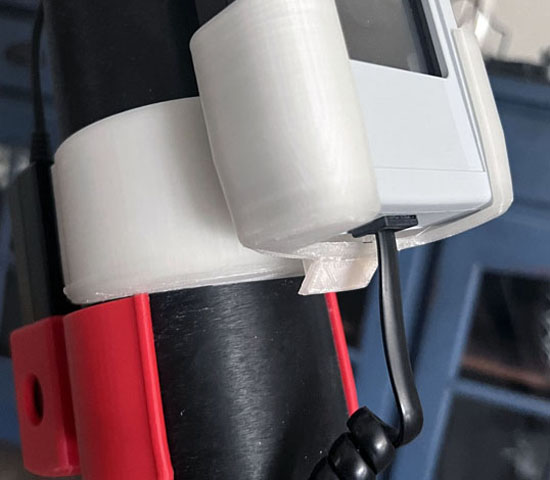
After making the holder I found that the coiled cable would catch on the bottom of the hand controller holder if it was placed in the holder LCD screen out. The solution was to add a small angled ramp to the bottom that made for a smooth release. Since I was using ABS plastic I used PVC glue to attach it. A little filing was needed to make the ramp merge smoothly into the holder.
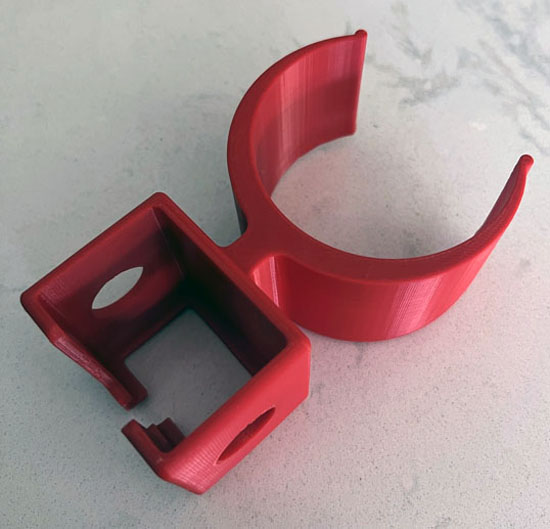
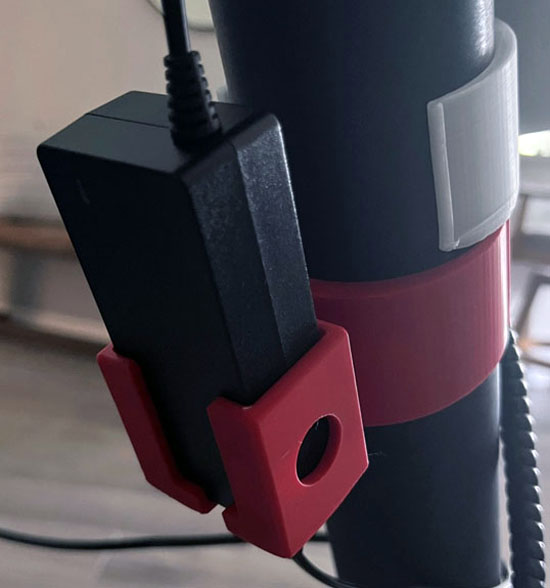
At home I will likely be using the two small brick power supplies to power the mount and ASIAir Plus. I wanted to get them off of the ground and decided that the leg clamp used for the hand controller could be reused and made into a power supply holder. The requirement was to have the input power cord on the bottom so an opening and slot for the cord was needed. Some extra holes were added to allow for better ventilation, lighten the holder and use a bit less plastic. This holder works for both the G11 brick from Losmandy and the ASIAir Plus brick from ZWO. The line power input connector is offset on the brick so the hole at the bottom of the holder needed to be big enough to handle the cord position regardless of which way the brick was inserted. Unlike the hand controller the power supplies would only be accessed at the beginning and end of the session so red ABS was used instead of glow-in-the-dark ABS. Additionally, the power supplies would be facing towards the inside of the mount to stay out of the way. I'll split the power supply holders across two legs.
This opens the door to other options, like a leg mounted eyepiece or even an iPad holder.
I was on a roll with the leg clamp holders so why stop? This one, still in the 3D printer, is for the ZWO Electronic Automatic Focuser remote when it is used. Usually a temperature probe is plugged into the remote port of the EAF.
When you're at a dark sky location you are your own best backup system. This is especially true when you have an unusual cable. For the Gemini 2 I purchased extra motor cables from Losmandy.
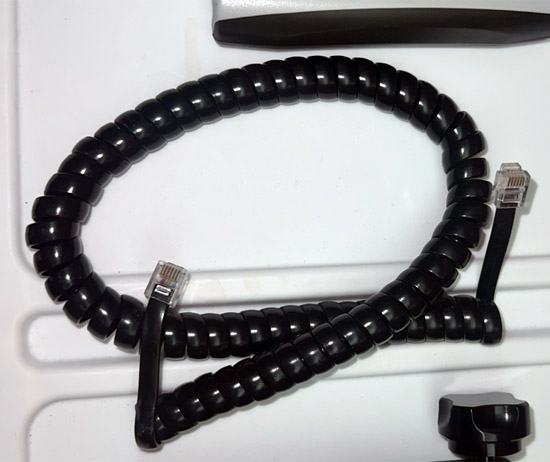
For the coiled hand controller cable I decided to see if a generic cable would work. After purchasing a pair of coiled cables from Amazon for under $10 I tested the pins at both ends to make sure that they matched the original. They worked perfectly.
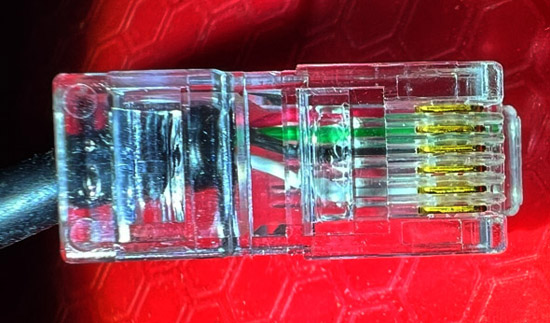
While I have a BR-355S4 GPS a friend didn't. He was shocked at the price. We found that the same model GPS with a DIN connector was about $40. We haven't tried it yet but it appears that if the DIN end is replaced with a RJ-12 end we should have a compatible GPS. In the photo the pins (bottom to top) are NC, White, NC, Black, Green and Red. This would expect that the wiring in the DIN cables matches these colors. I'll update this page once we give that a try.